


A step-by-step guide to replacing the side brush motor on bObsweep Standard or Pethair. Follow the video or multimedia directions in order to open up bObsweep, remove the main board, replace the side brush motor, then close your vacuum for future use.
This repair requires a Phillips head screwdriver and one replacement side brush motor that's compatible with your brush. Some models have a screw-on side brush, while others snap onto Bob. Both are available for purchase at bobsweep.com.
Remove the Cover Screws
Make sure the side brush has been removed before beginning this repair.
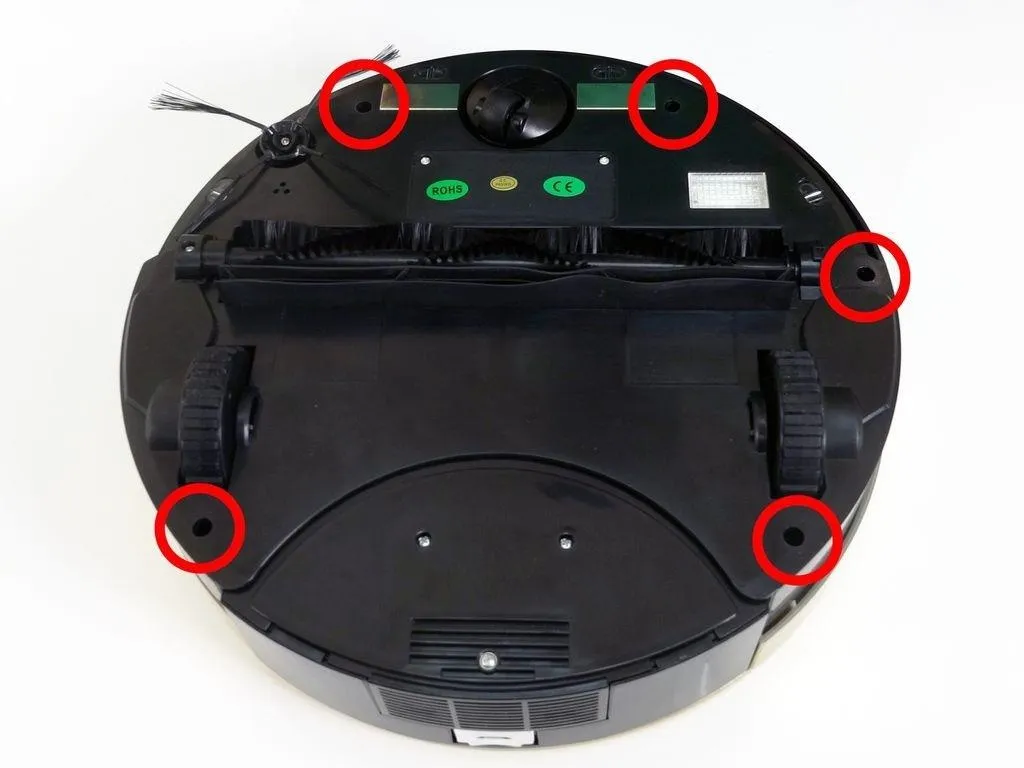
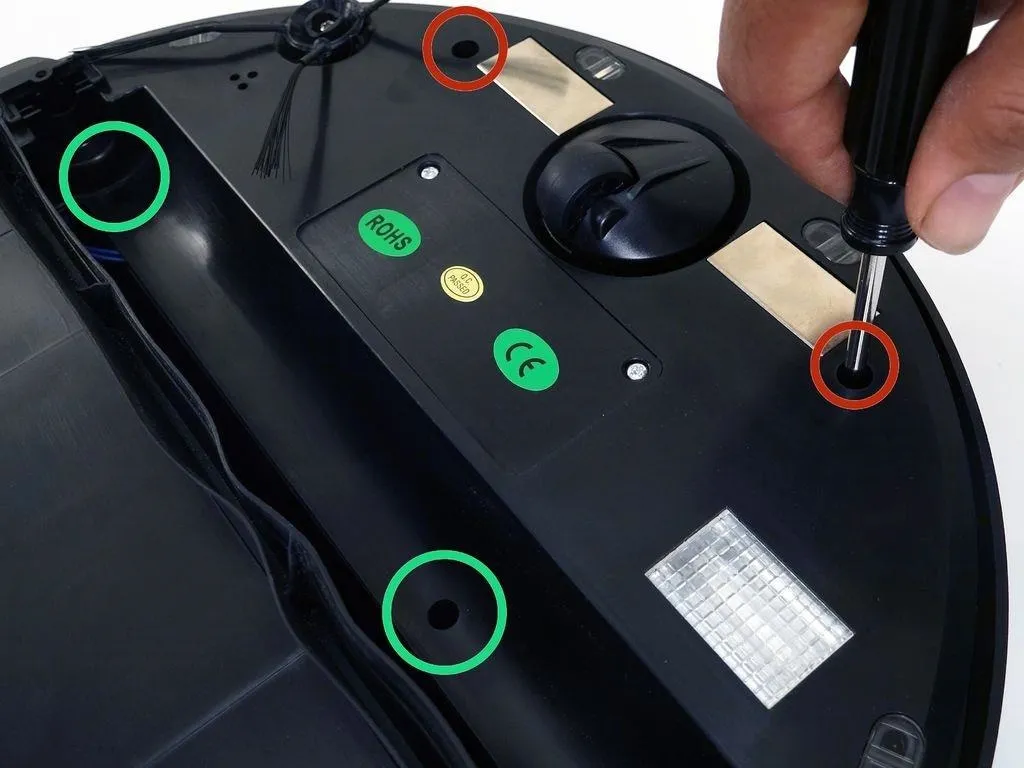
Flip Bob over and un-install the screws on around Bob's underside. They hold the cover together. (Highlighted Red)
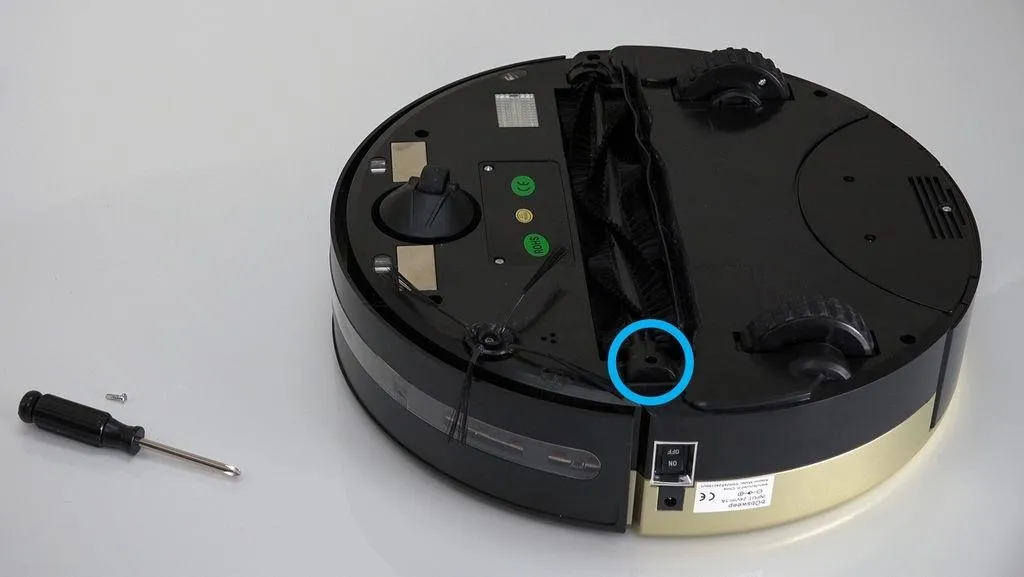
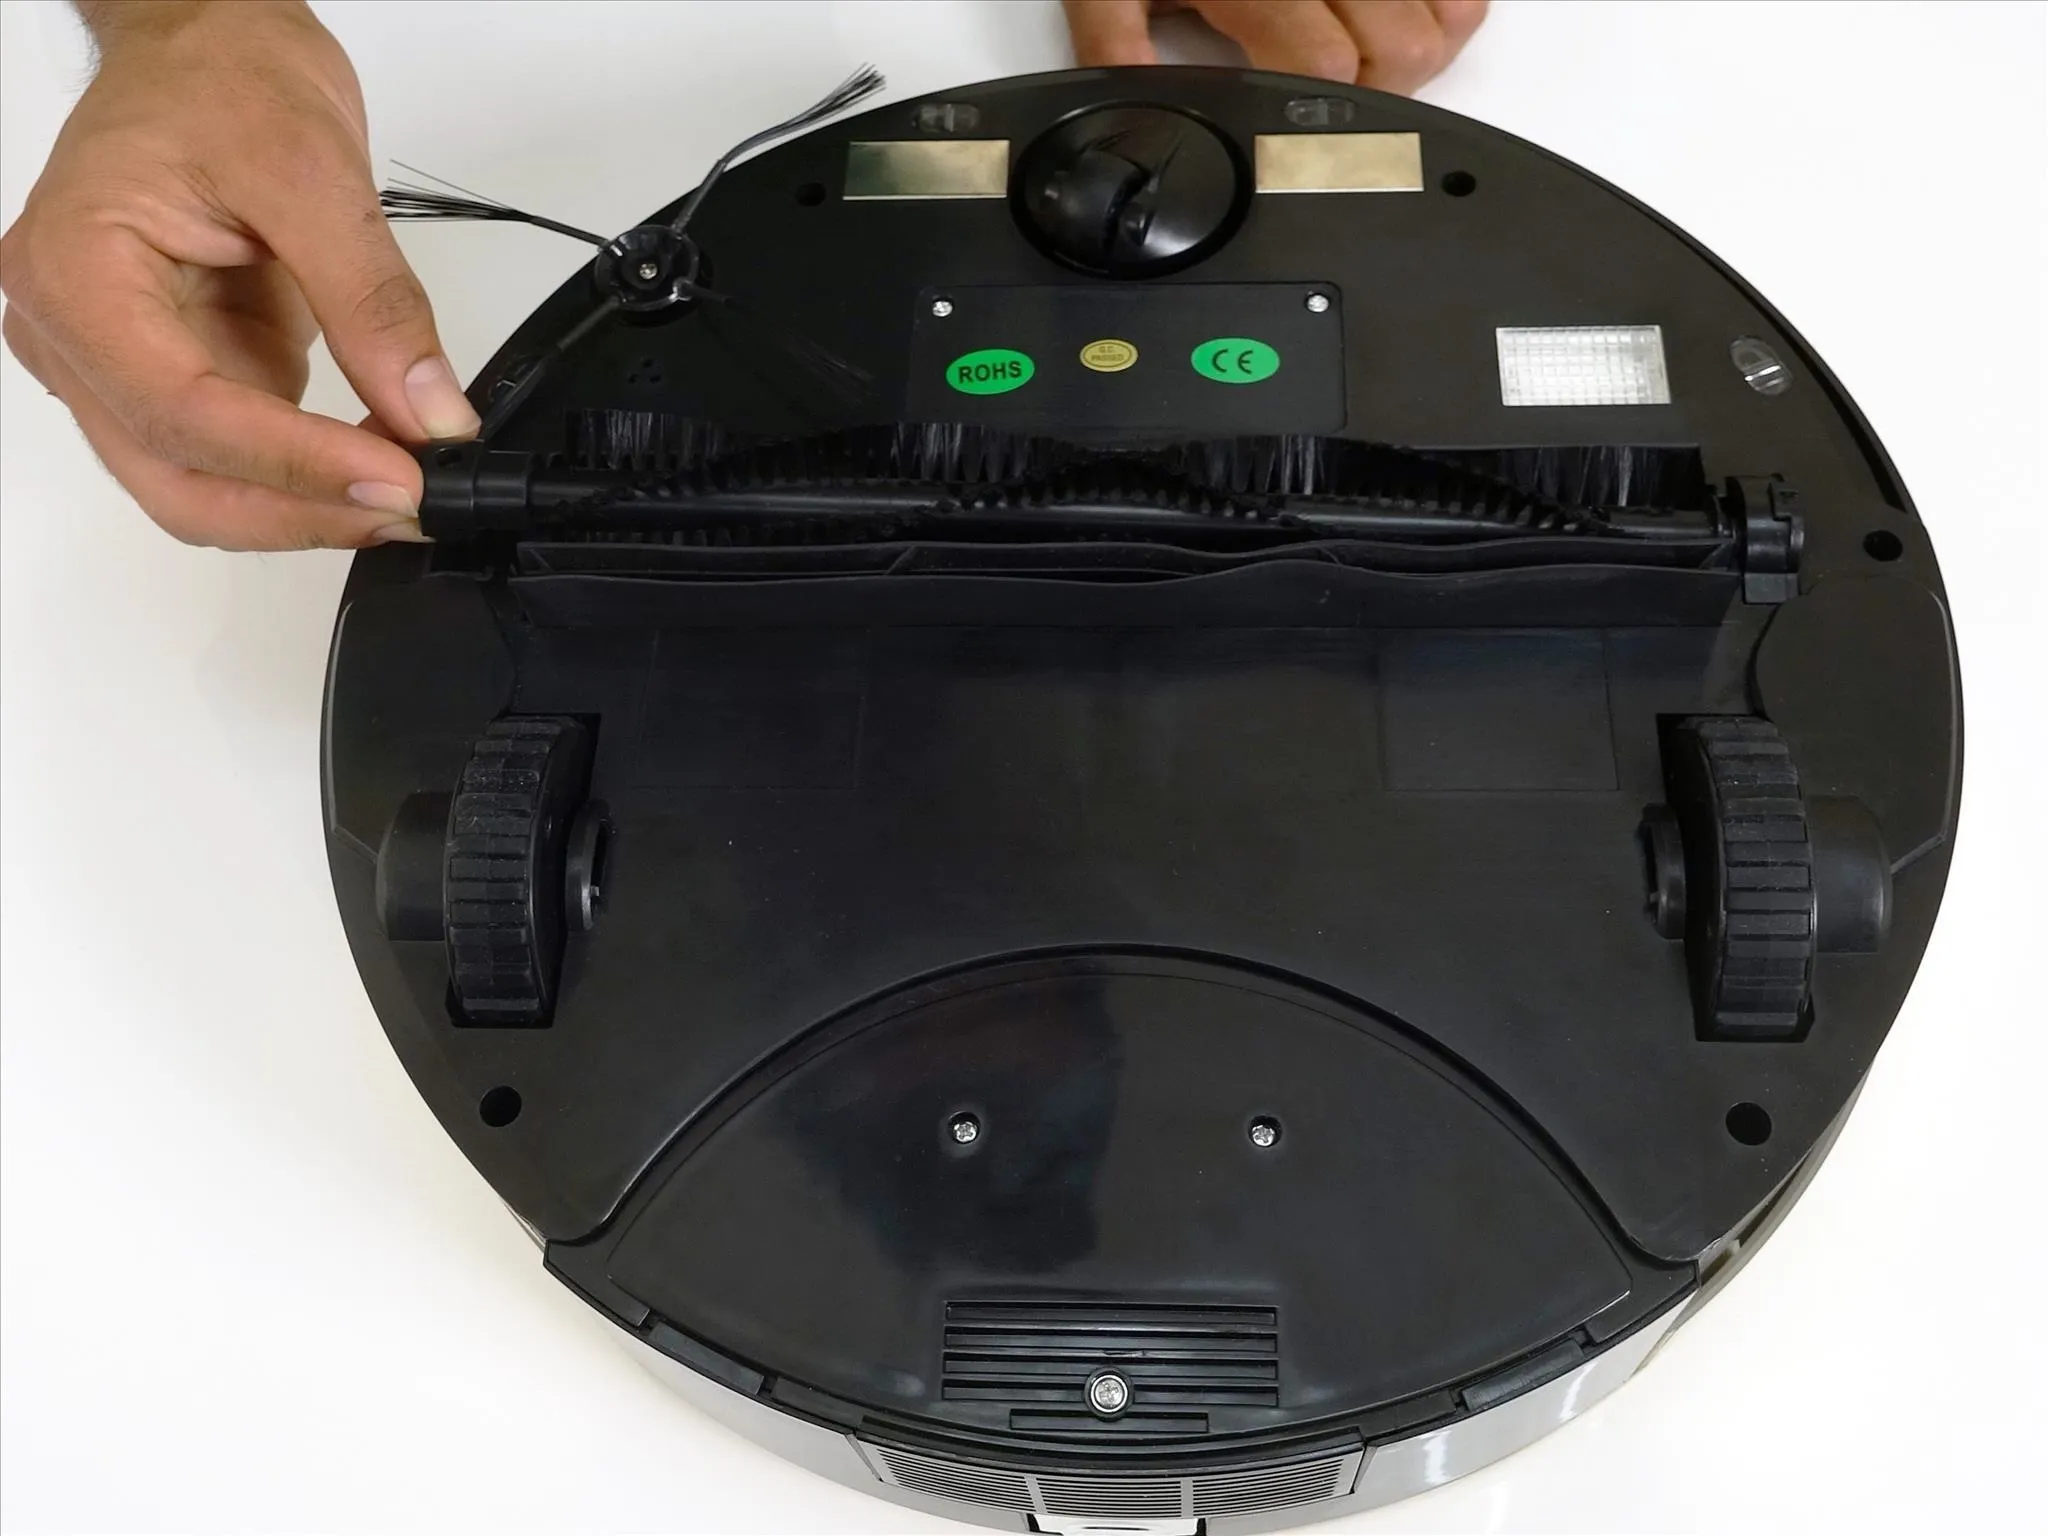
Remove the main brush. Unscrew the holder, and lift the brush out. Keep all brush parts aside for reassembly. (Highlighted Blue)
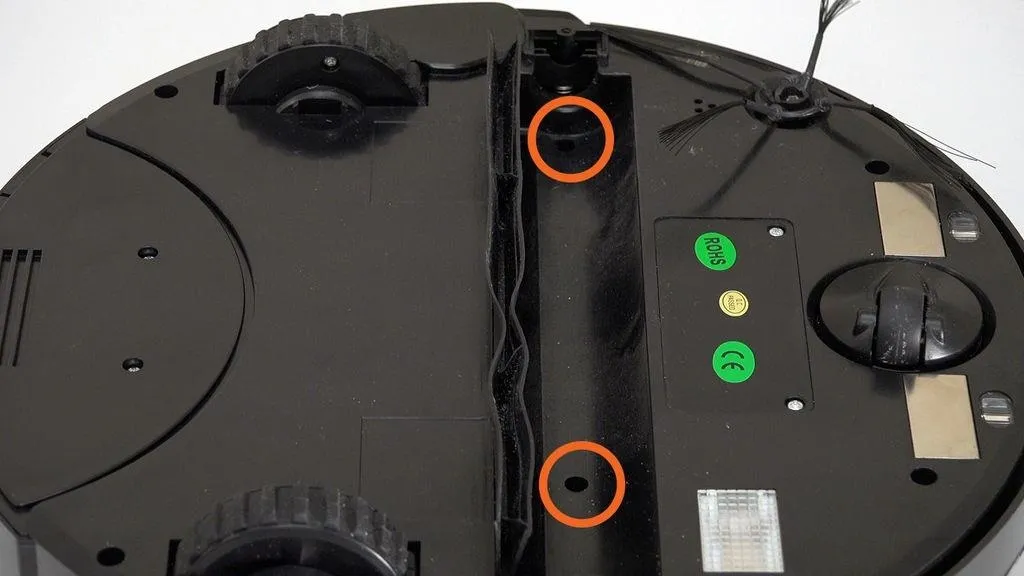
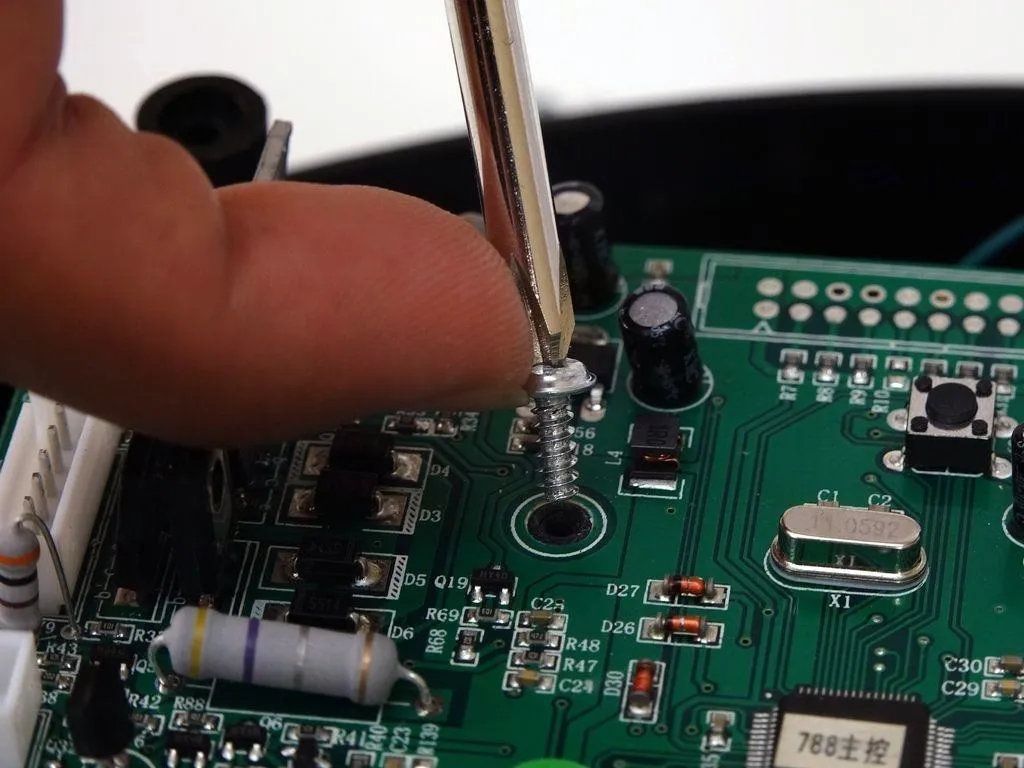
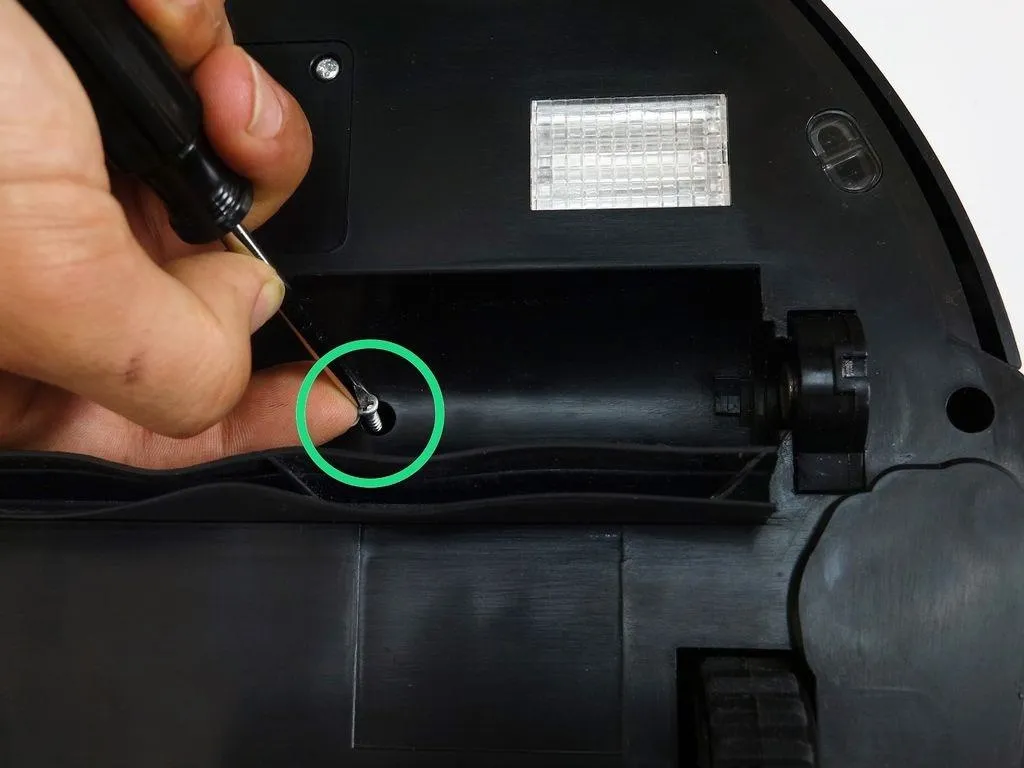
There are two screw holes inside the brush compartment: one in the centre, one on the left end. (Highlighted Orange)
Remove both and keep apart from the main brush parts.
Depending on your model, there may be only 6 screws installed in the 7 holes of your bObsweep.
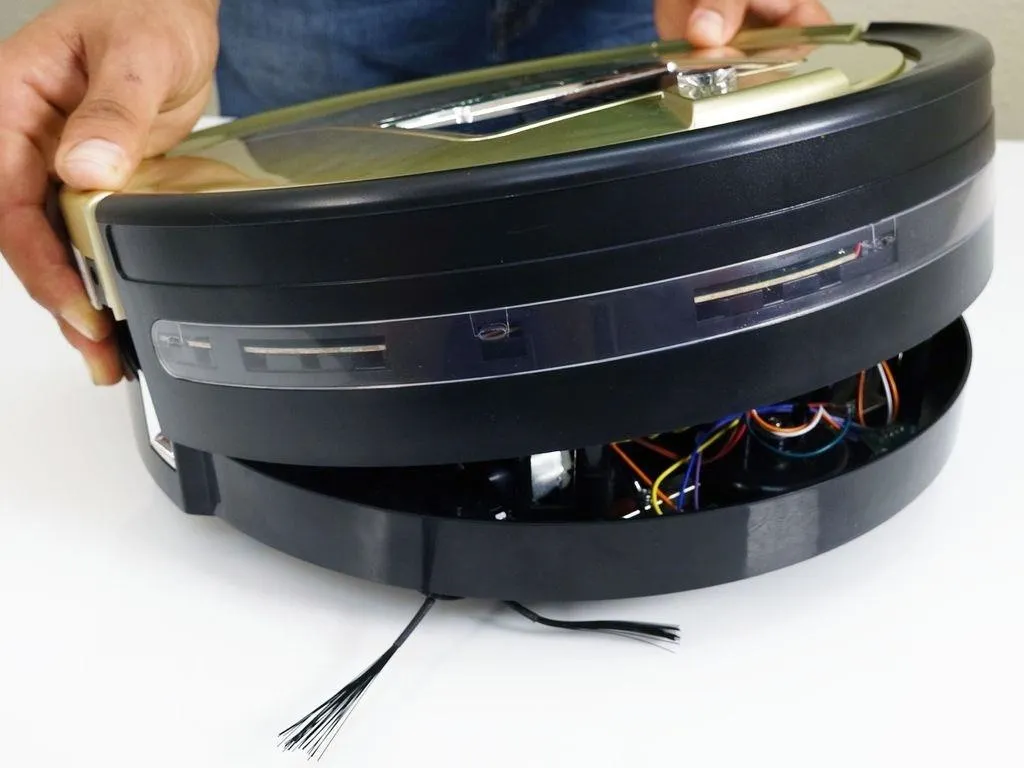
Detach the Cover Completely
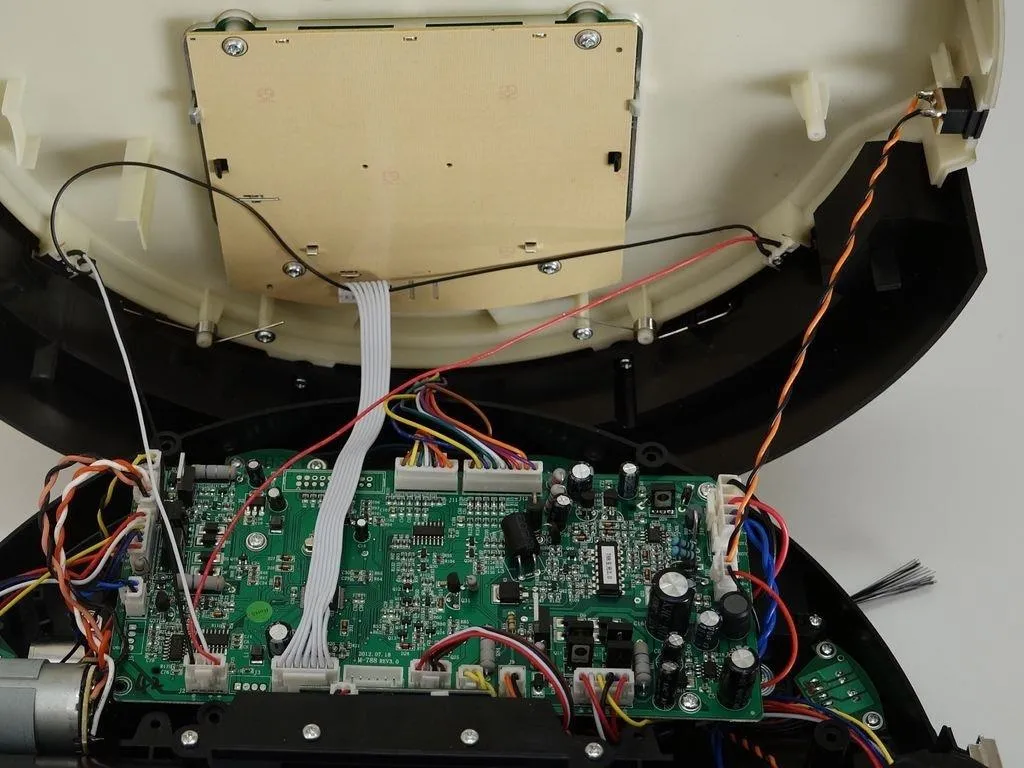
Flip Bob over carefully holding the cover together. Then, lift the cover up to reveal bObsweep's main board.
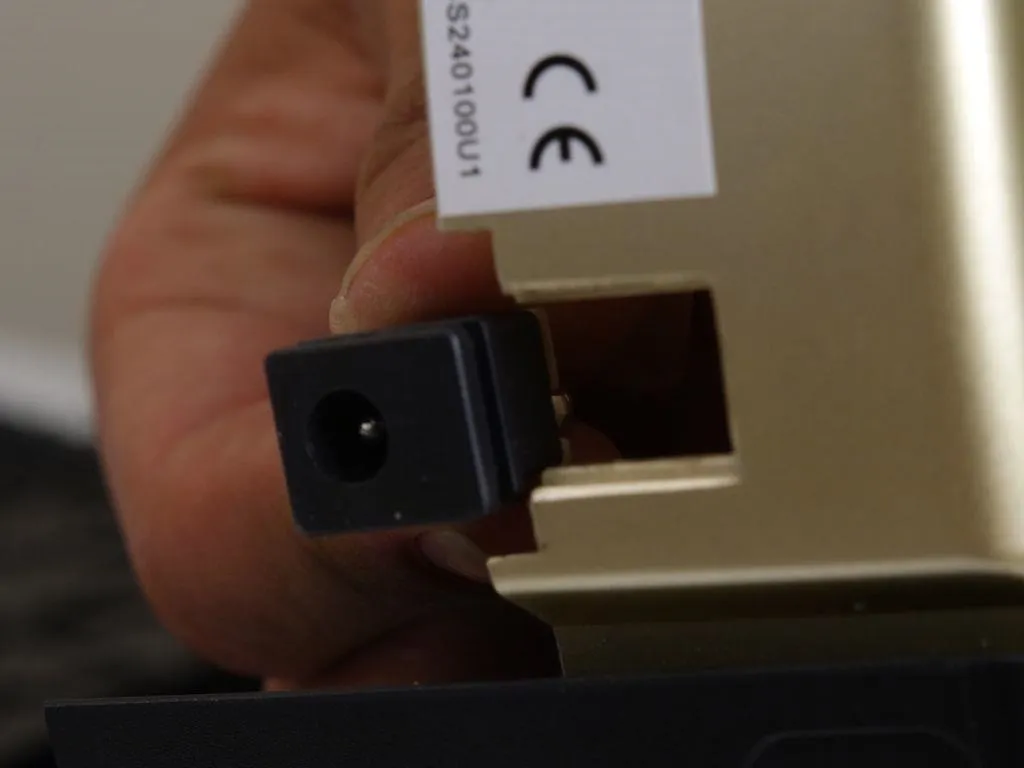
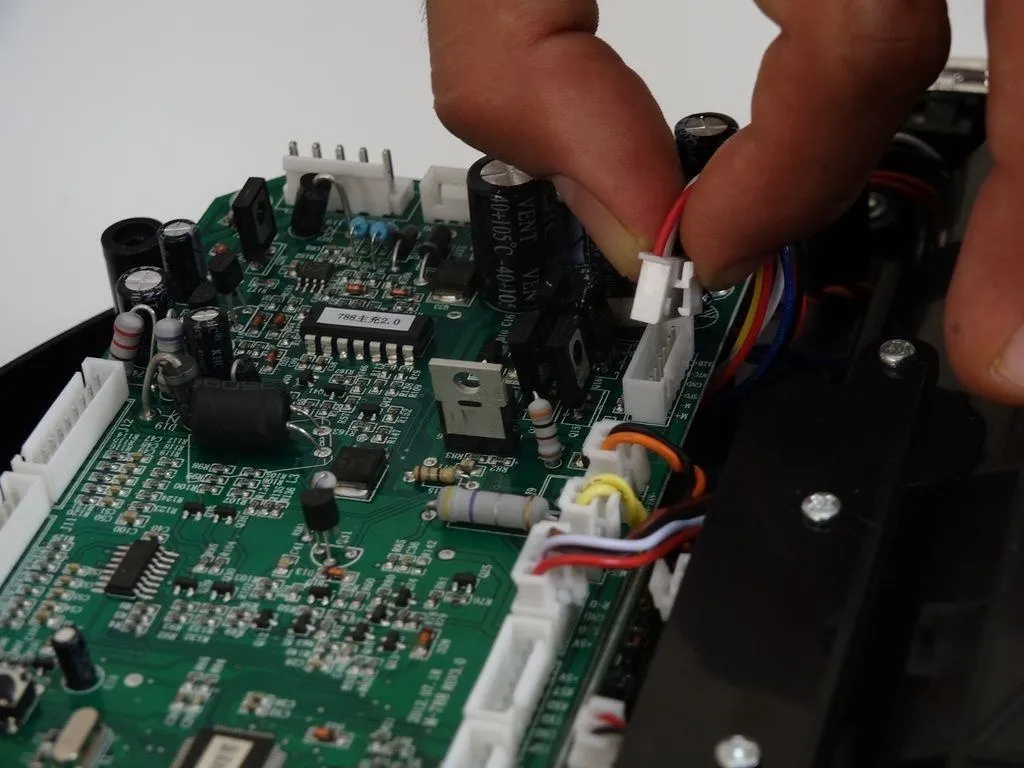
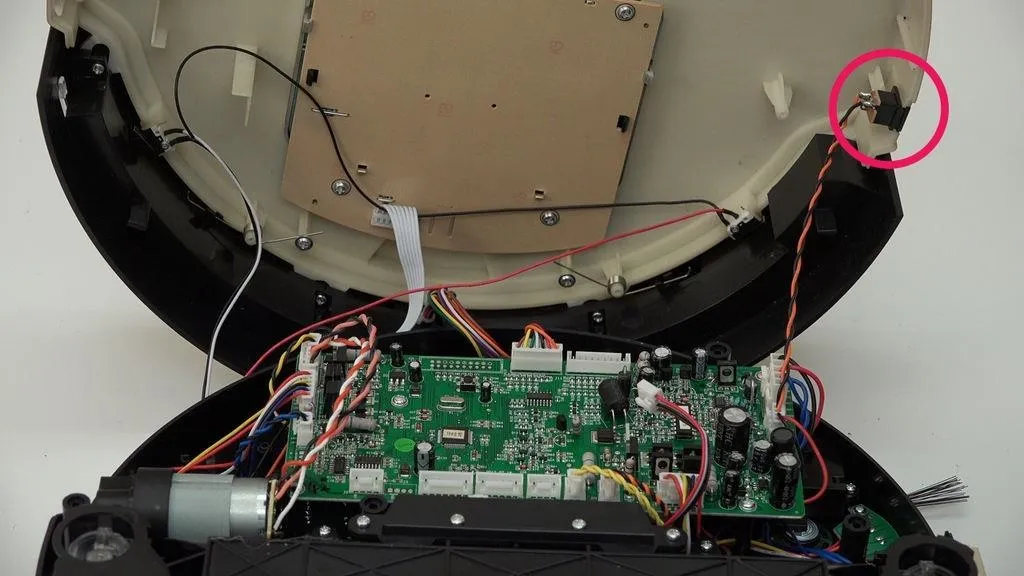
Now you can detach the power inlet from the right side of Bob's cover. Grip it and slide it out.
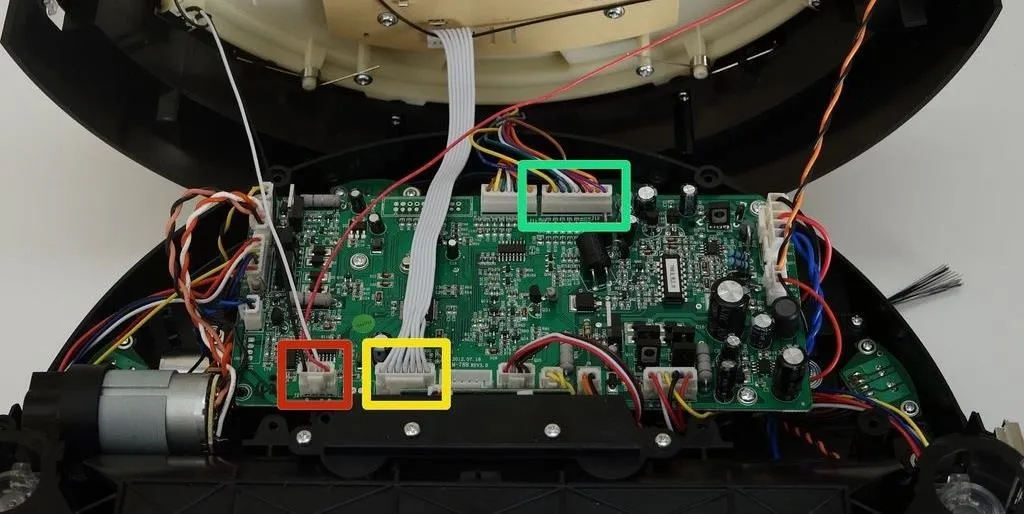
Remove three circuit plugs from the motherboard. Pinch the small white tab on the side of each plug and pull up to detach.
- On the bottom left corner: a small connector with red, black and white wires. (Highlighted Red)
- One thick white wire that attaches on the right side of the previous connector. (Highlighted Yellow)
- On the top edge of Bob's motherboard: a wide multicoloured connector. (Highlighted Green)
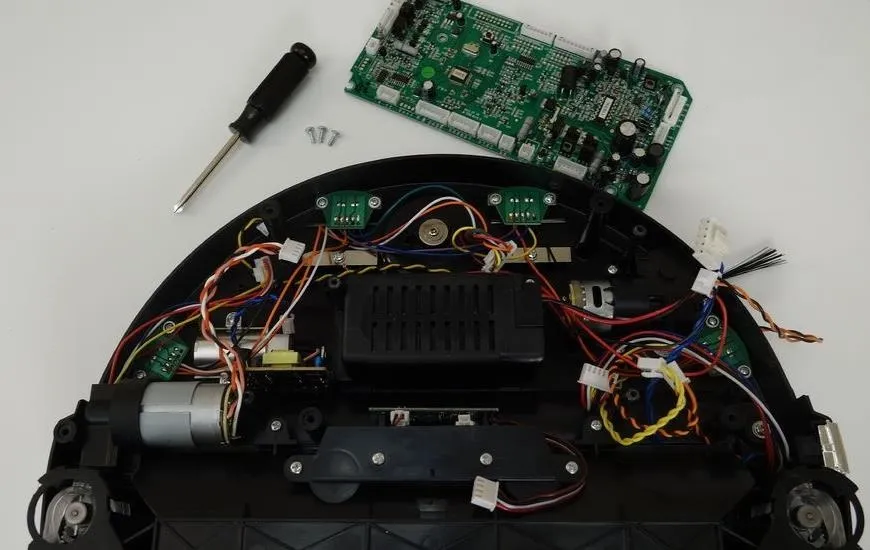
Remove the Main Board
Detach all the circuit plugs from the main board. Firmly pinch the small white tab on the side of each plug, then pull upward to remove.
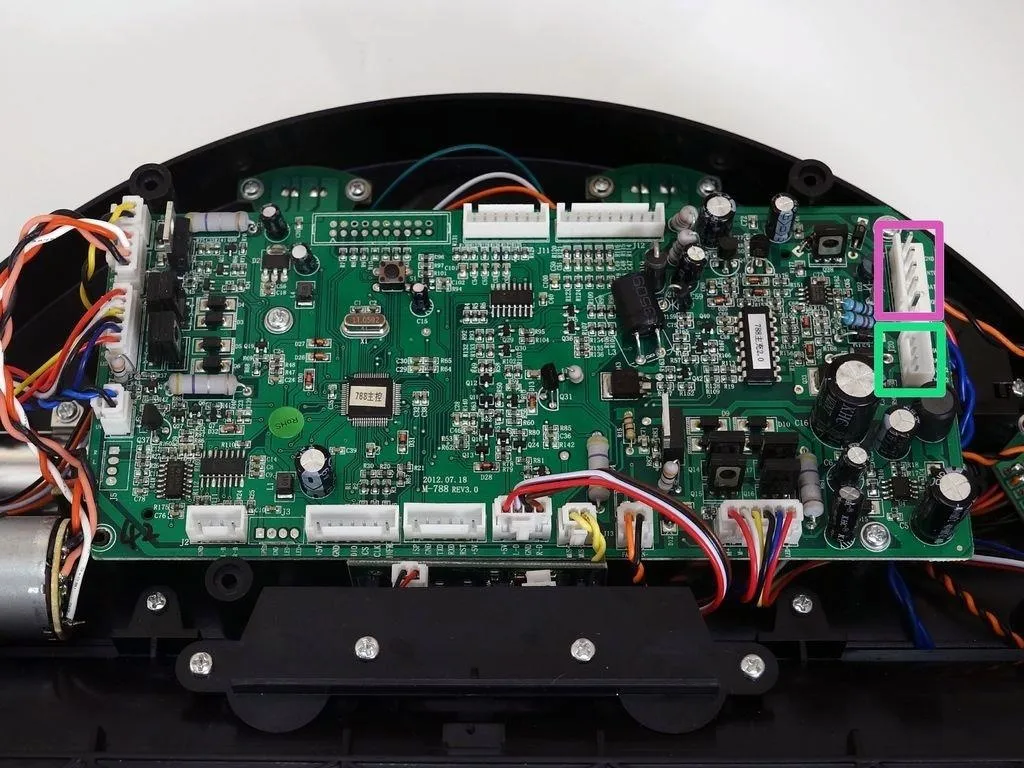
There are three screws that secure the main board inside Bob. (Highlighted Pink)
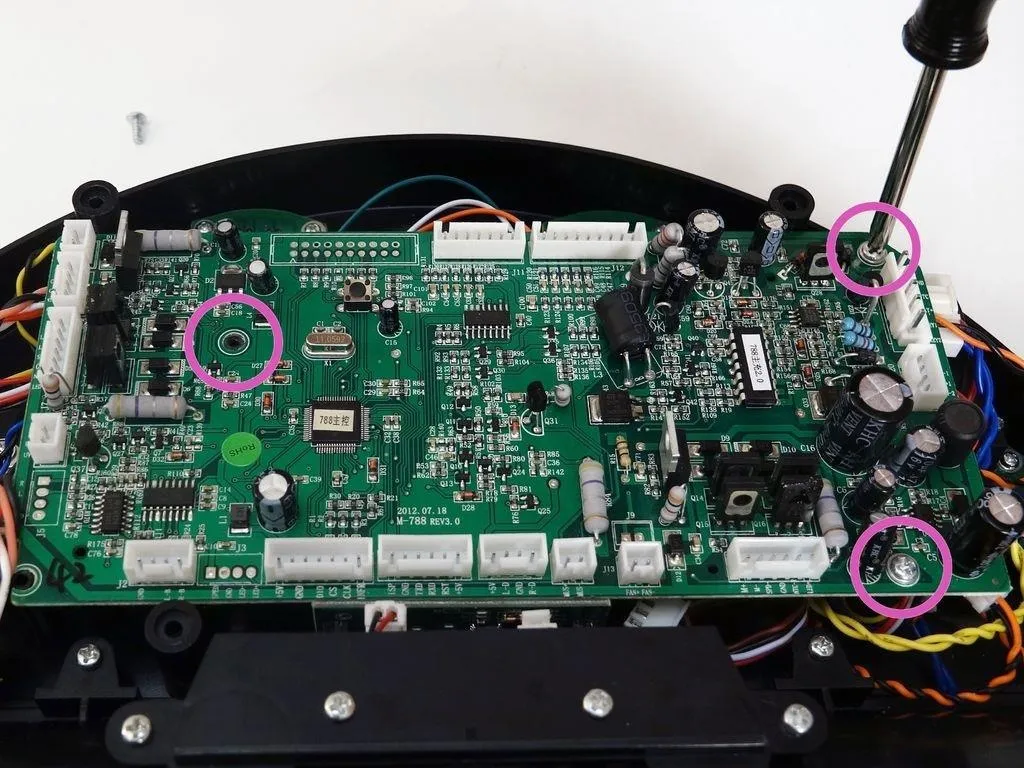
Remove all the screws, then lift the main board straight up and put aside.
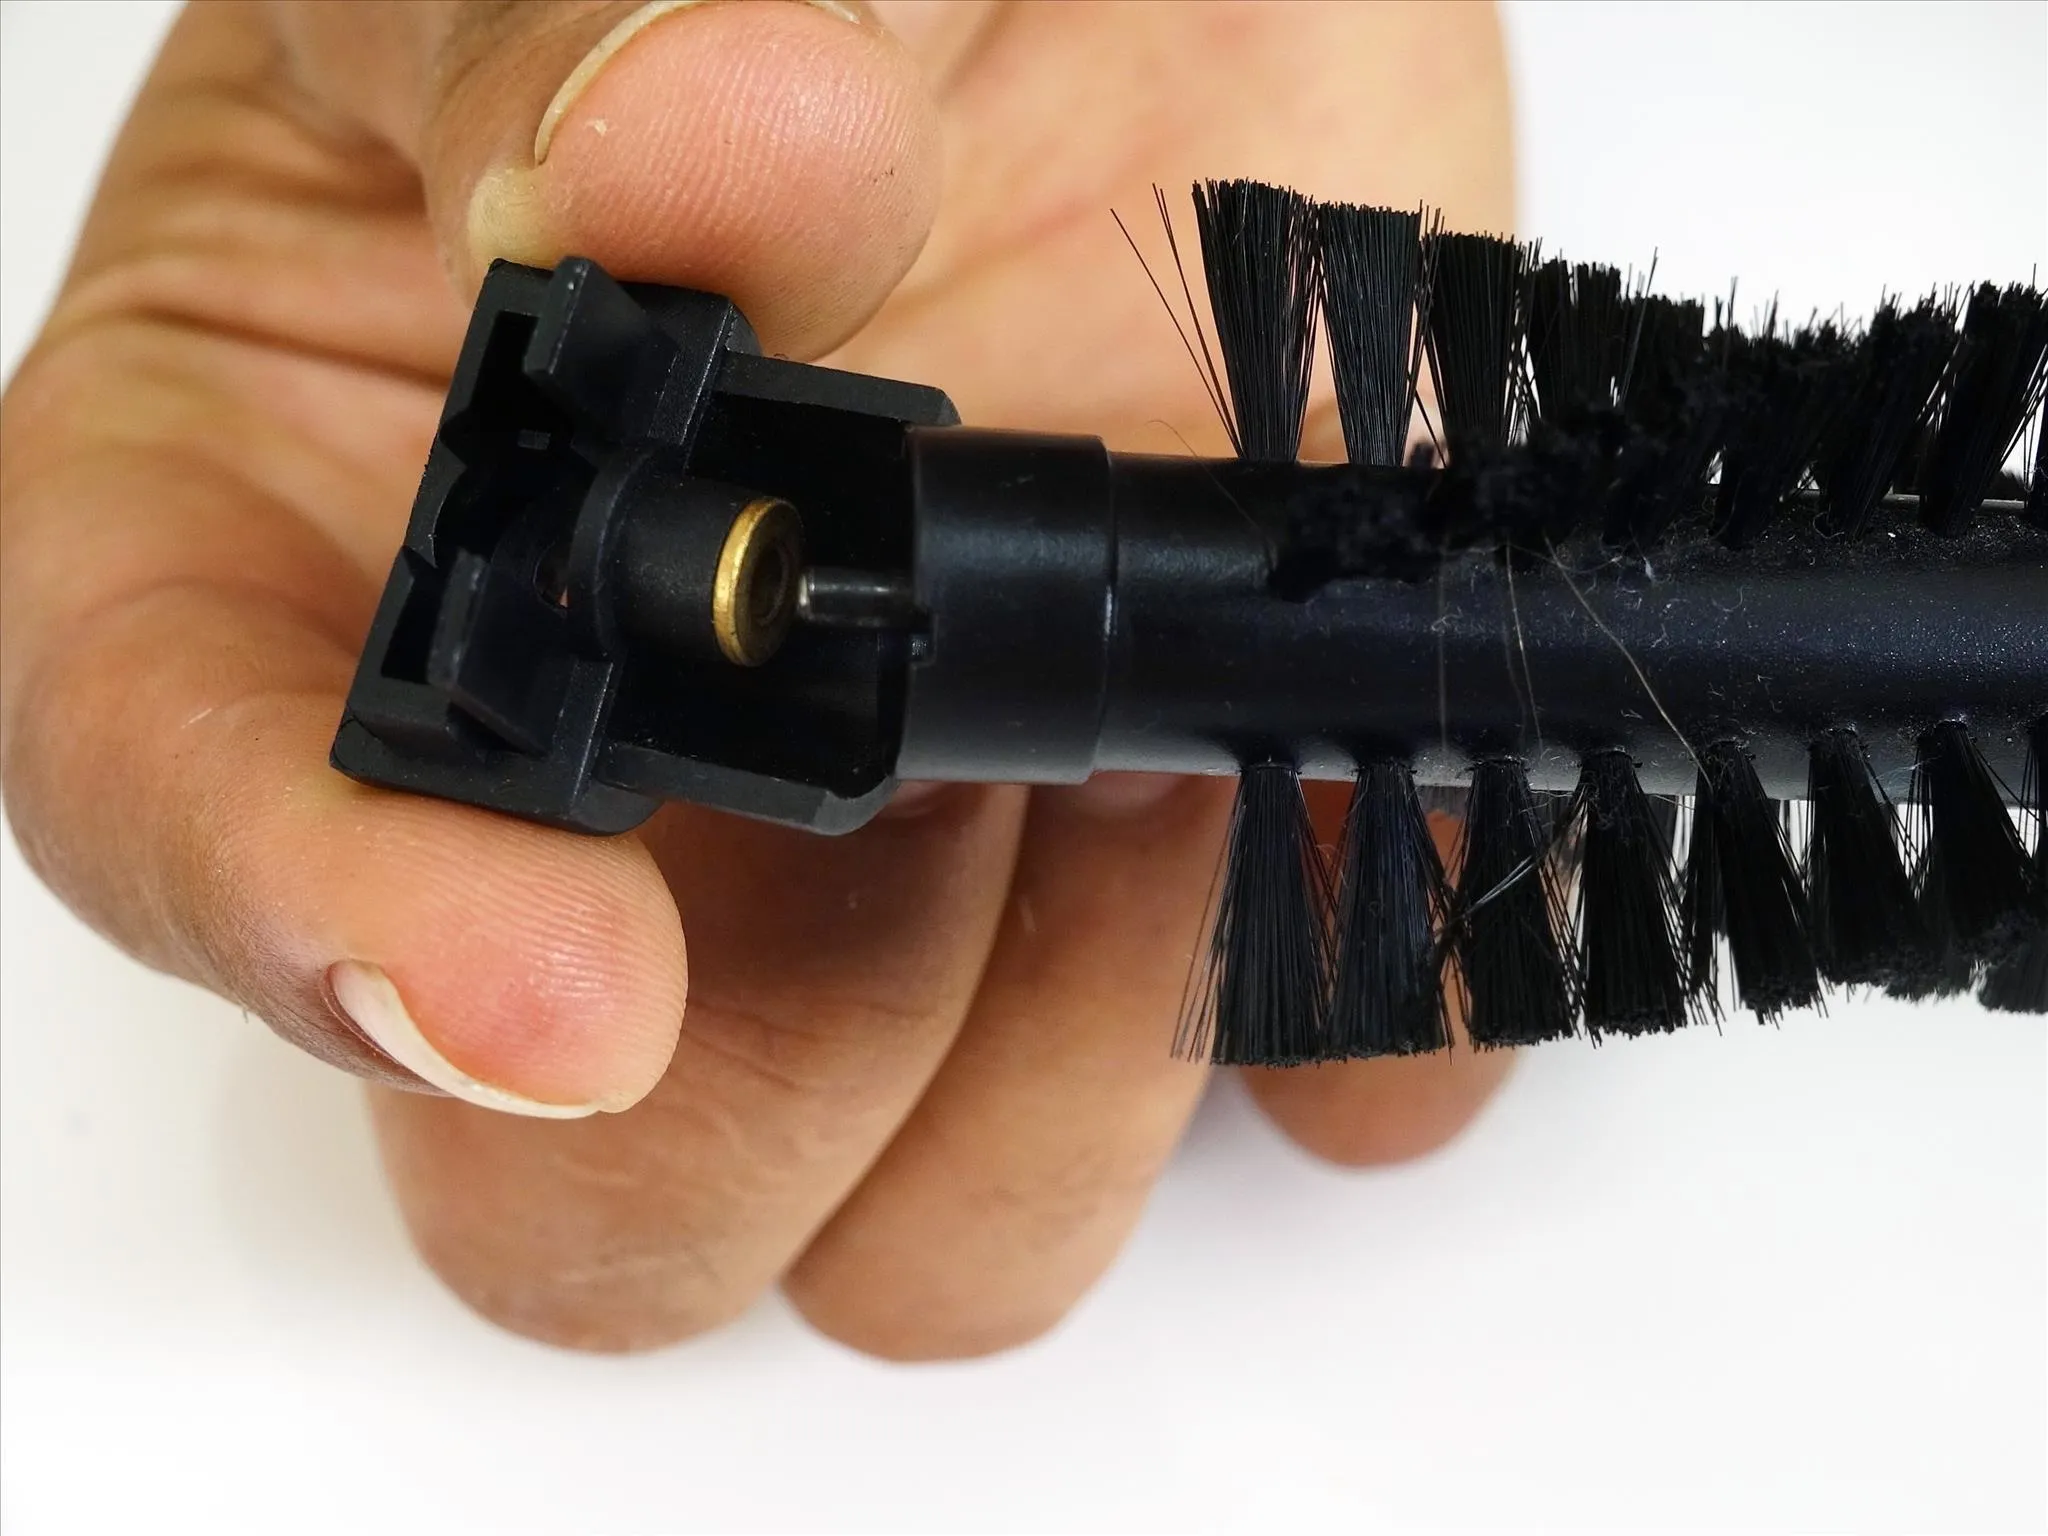
Remove the Side Brush
Once the main board is removed, you will see the side brush motor in front of Bob's right wheel.
Uninstall the three screws holding it inside bOb.
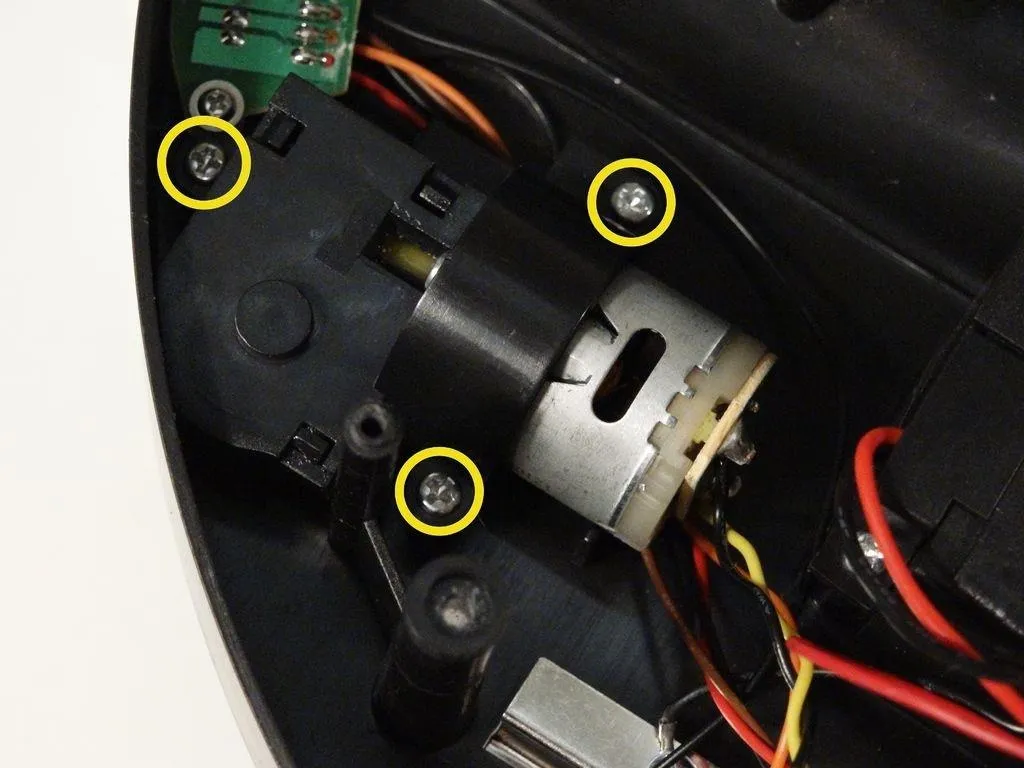
Lift up and replace with your new motor.
The motor pictured above requires a snap-on side brush. If yours is a screw-on brush motor, these repair steps still apply.
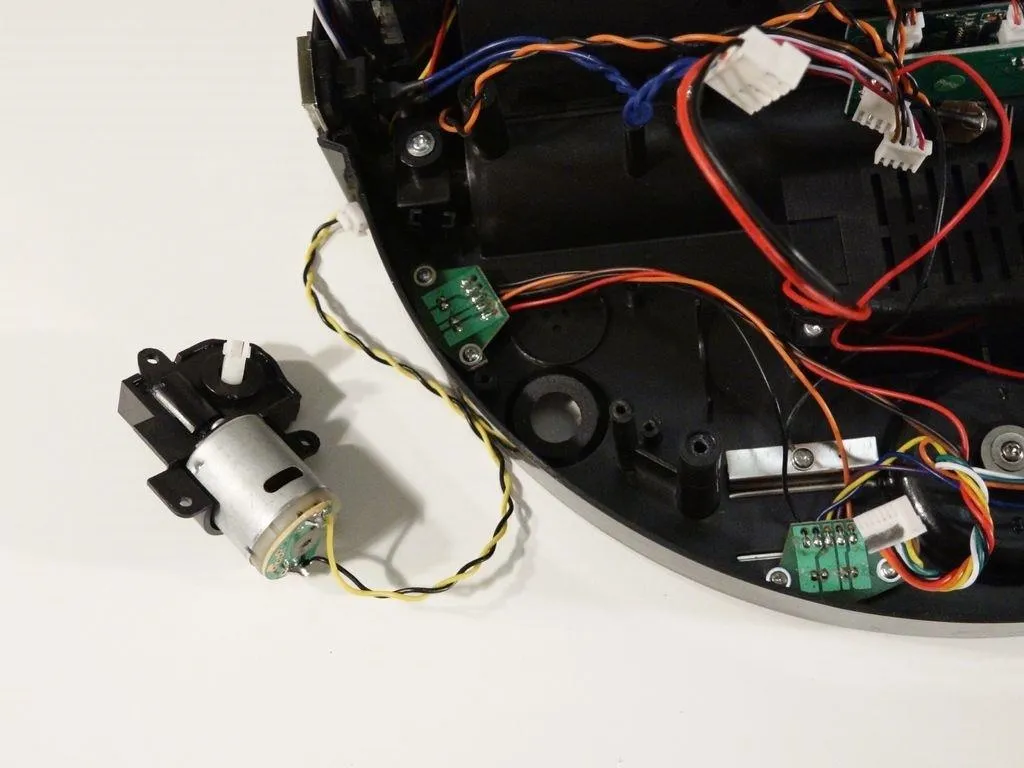
Install the New Motor
Place the new motor in the open space, with the brush attachment facing down.
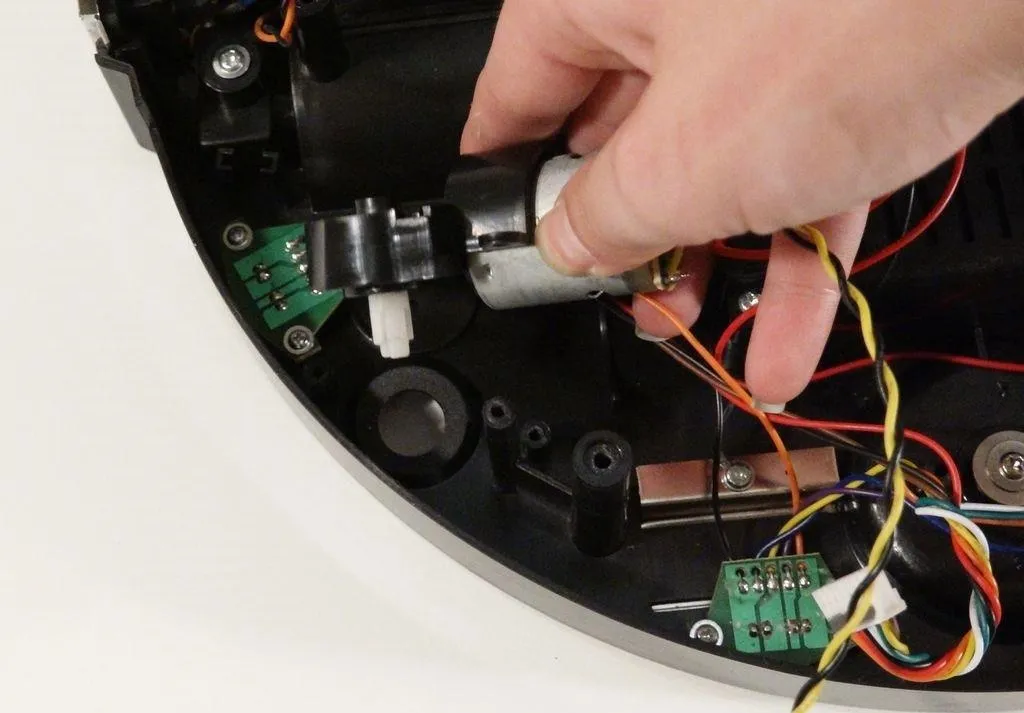
Ensure it sits flat, and aligns with the screw posts in Bob.
Install the three screws removed previously, then replace the main board.
Replace the Main Board
Place the main board back in bObsweep. Make sure the holes in the main board line up with the screw posts on Bob.
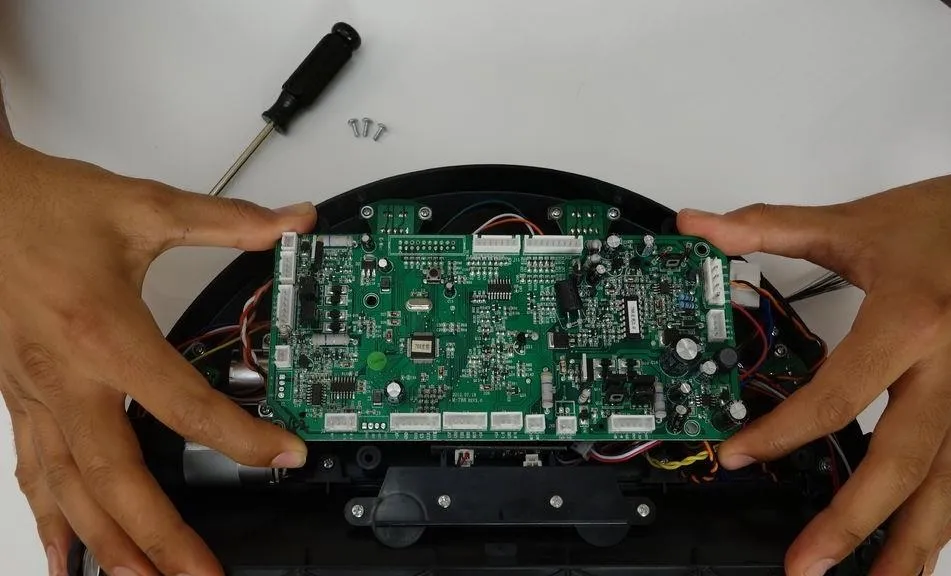
Install the three screws to secure the main board. Then, attach all the circuit plugs correctly.
The order along the motherboard's left edge from the top down is:
A small yellow and black circuit plug.
The main brush motor's circuit plug which has two pairs of twisted wires, one red and white, the other pink and black.
A wider, multicoloured circuit plug which is attached to bObsweep's left wheel.
Finally, a small circuit plug with black and blue twisted wires.

Connect the Bottom Row of Circuit Plugs
The order from left to right along the bottom ledge should be reconnected as follows:
A small circuit plug with red, black, white, and brown wires.
A small yellow-wired plug.
A small black and orange-wired circuit plug.
A circuit plug with multicoloured wires and a wide base which connects to Bob's right wheel.
There will be 3 empty spaces left in this row for now. Two will be filled when you put the cover back on.
Connect the Rest of the Plugs
At the top of the motherboard's right edge is a wide, red, black, and blue circuit plug. (Highlighted Pink)
Beneath that is a smaller plug for Bob's power inlet with orange and black wires. (Highlighted Green)
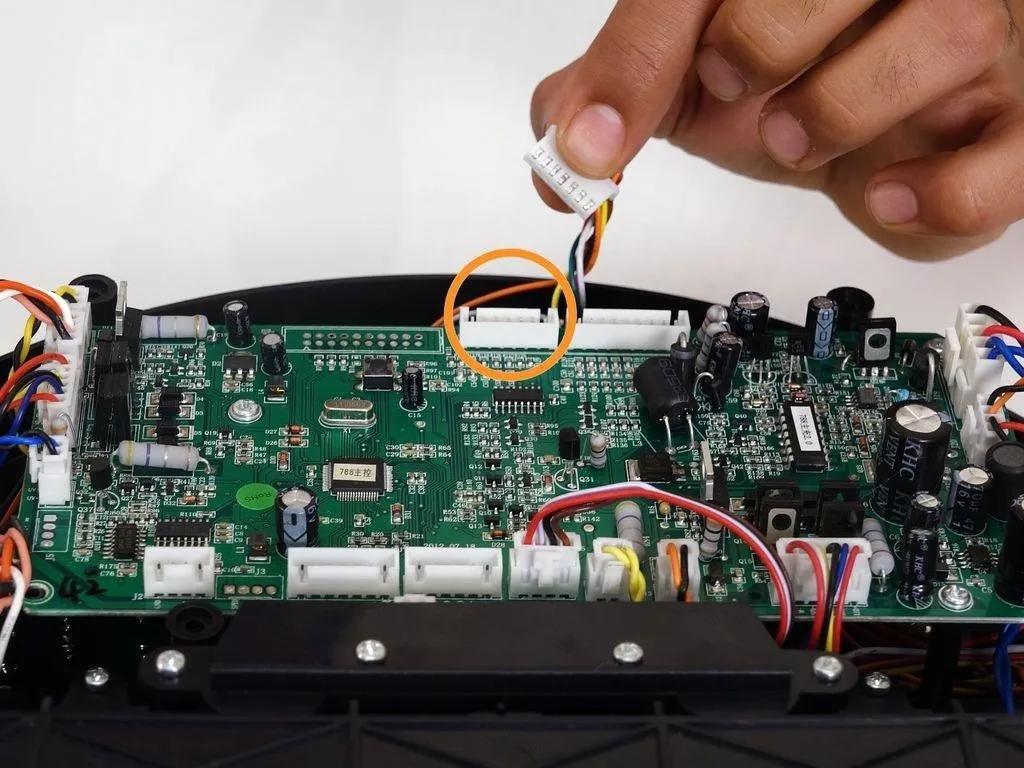
There are two wide, multicoloured circuit plugs that attach to the top edge of the motherboard. One was removed to detach bObsweep's cover, so the space will stay empty for now. The other plugs in on the left of the open space. (Highlighted Orange)
Connect the Cover
Slide the power inlet back into the space on bObsweep's cover. (Highlighted Pink)
Attach the circuit plug with multicoloured wires, to the top right edge of the motherboard.
Attach the smallest circuit plug in the lower left corner of the motherboard.
Attach the all-white circuit plug to the bottom of the motherboard, on the right side of the previous plug. When finished, it looks like this:
There should be one empty space in the middle of the bottom row.
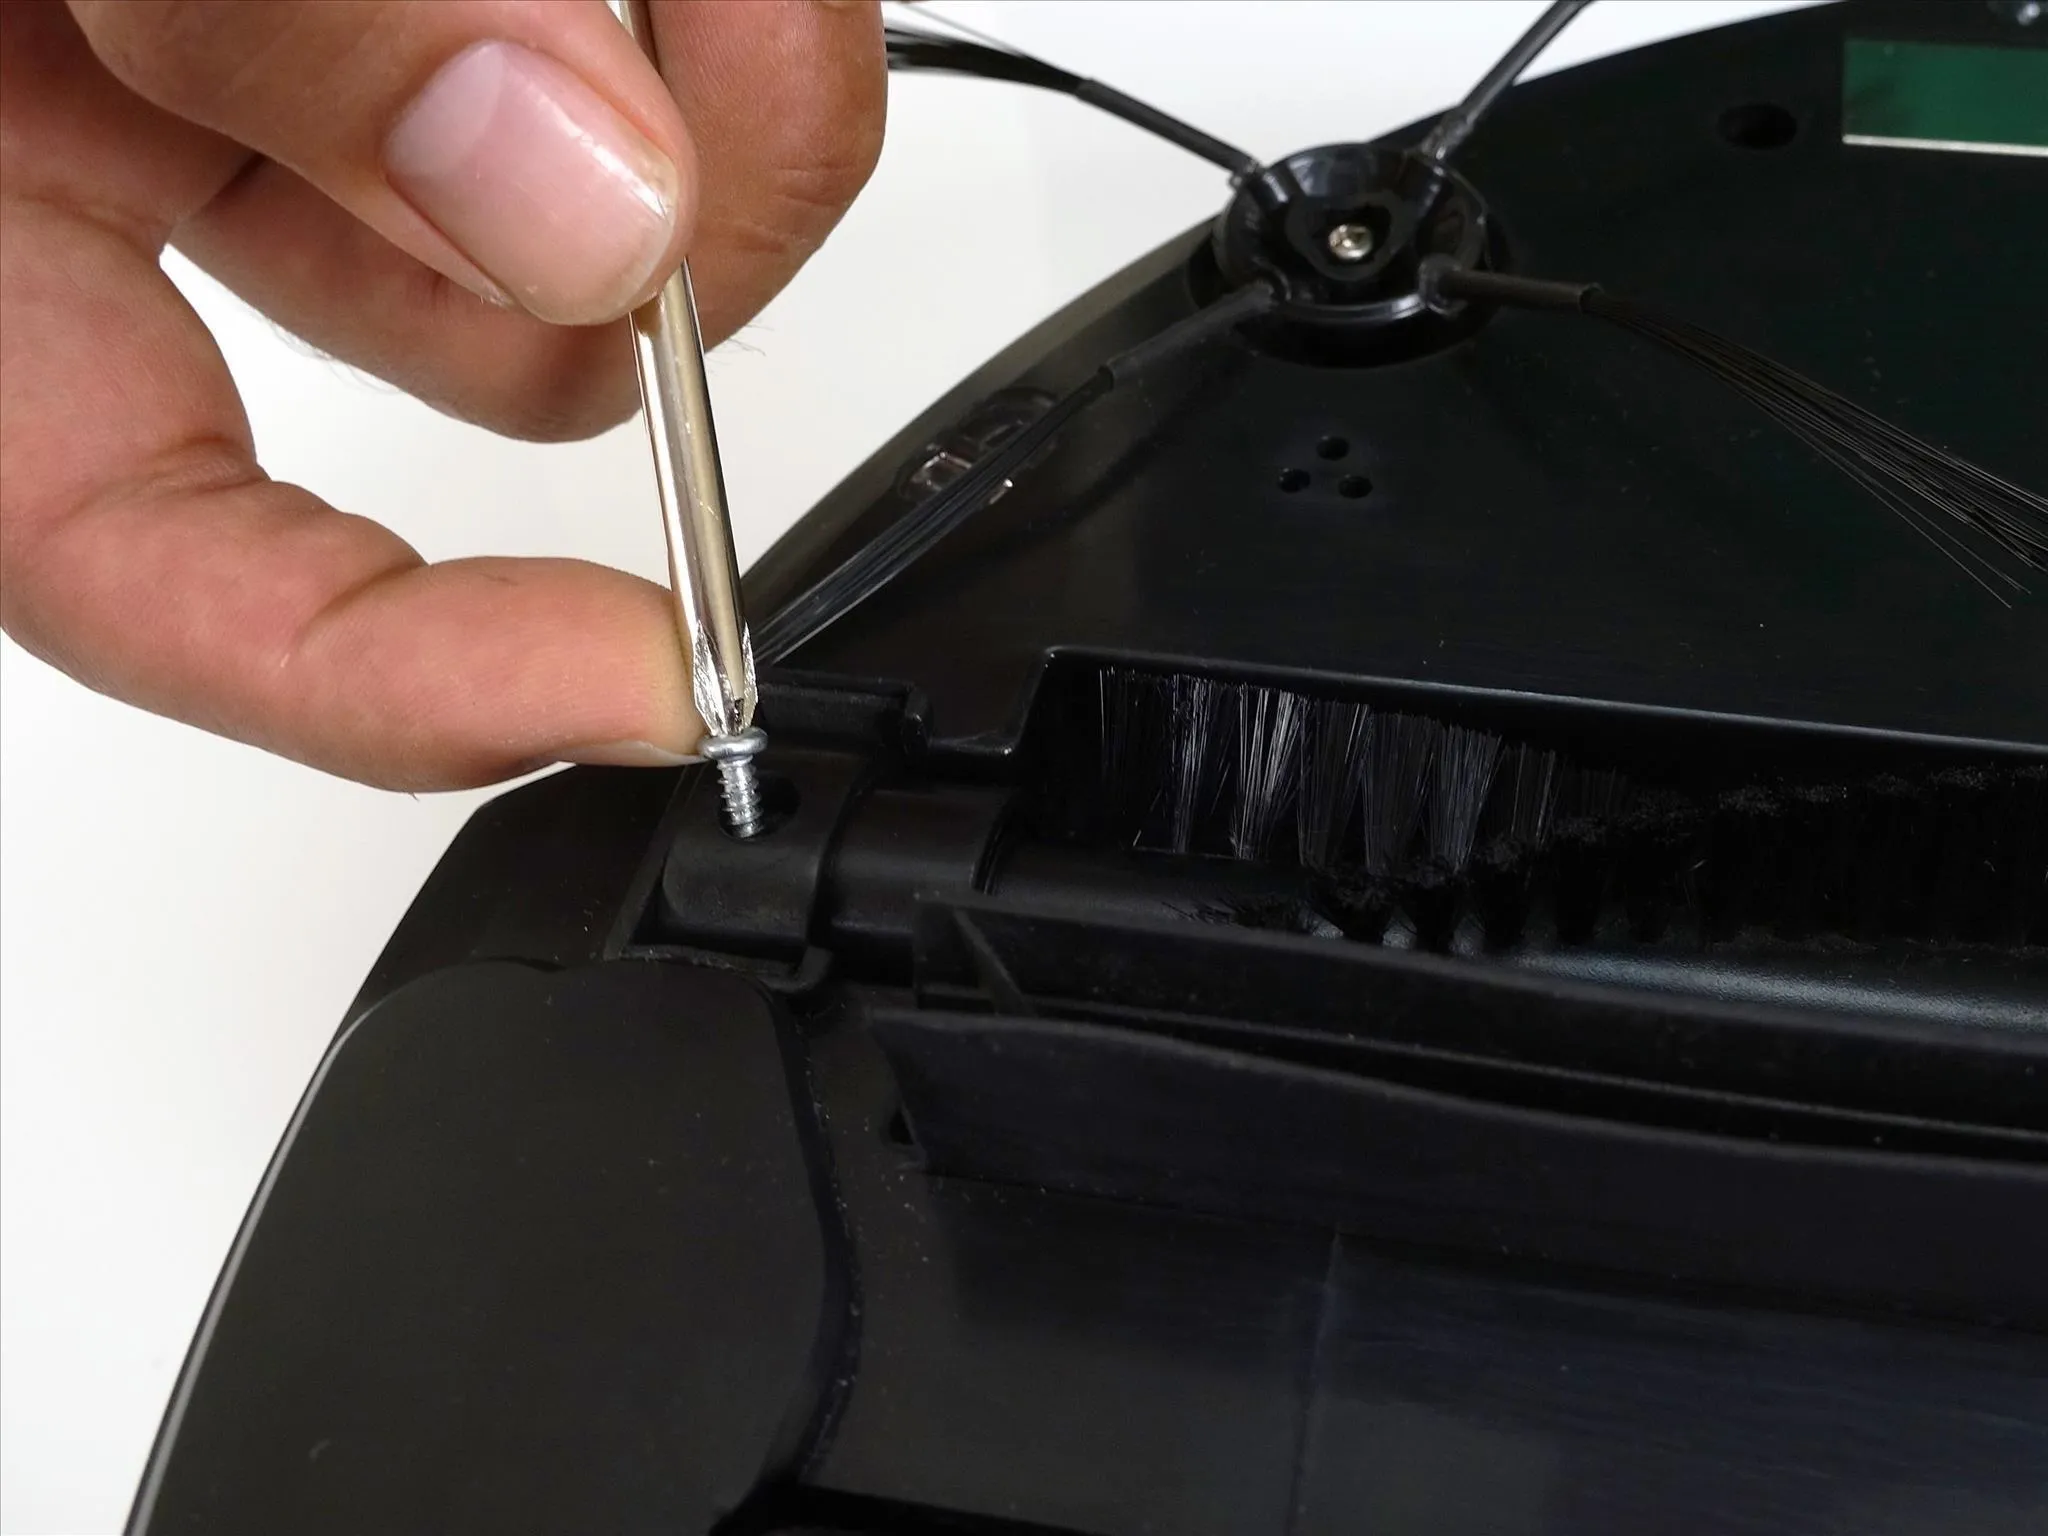
Secure the Cover Screws
Put bObsweep's top back on, and align the edges precisely.
Install the screws you removed at the start of this repair so you can seal the cover together.
There are five along the edges of bObsweep's underside. (Highlighted Red)
Plus one or two more in the screw holes inside the brush compartment. (Highlighted Green)
Depending on your bObsweep model, there may be only one screw in the brush compartment.
Install the Main Brush
Re-install the main and side brushes before using bObsweep again.
Attach the end piece first.
Put the square end in the square space inside bObsweep, then lower the brush in place.
Install the screw for your main brush and your repair is complete.


Comments
Be the first, drop a comment!