
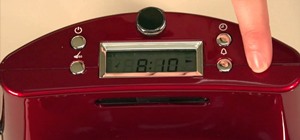
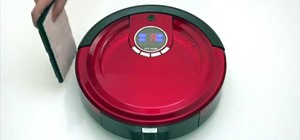
With just a Phillips head screwdriver and this walk-through, you can open and close any bObi robot vacuum. So long as you have a replacement wheel, follow these steps to install it yourself.
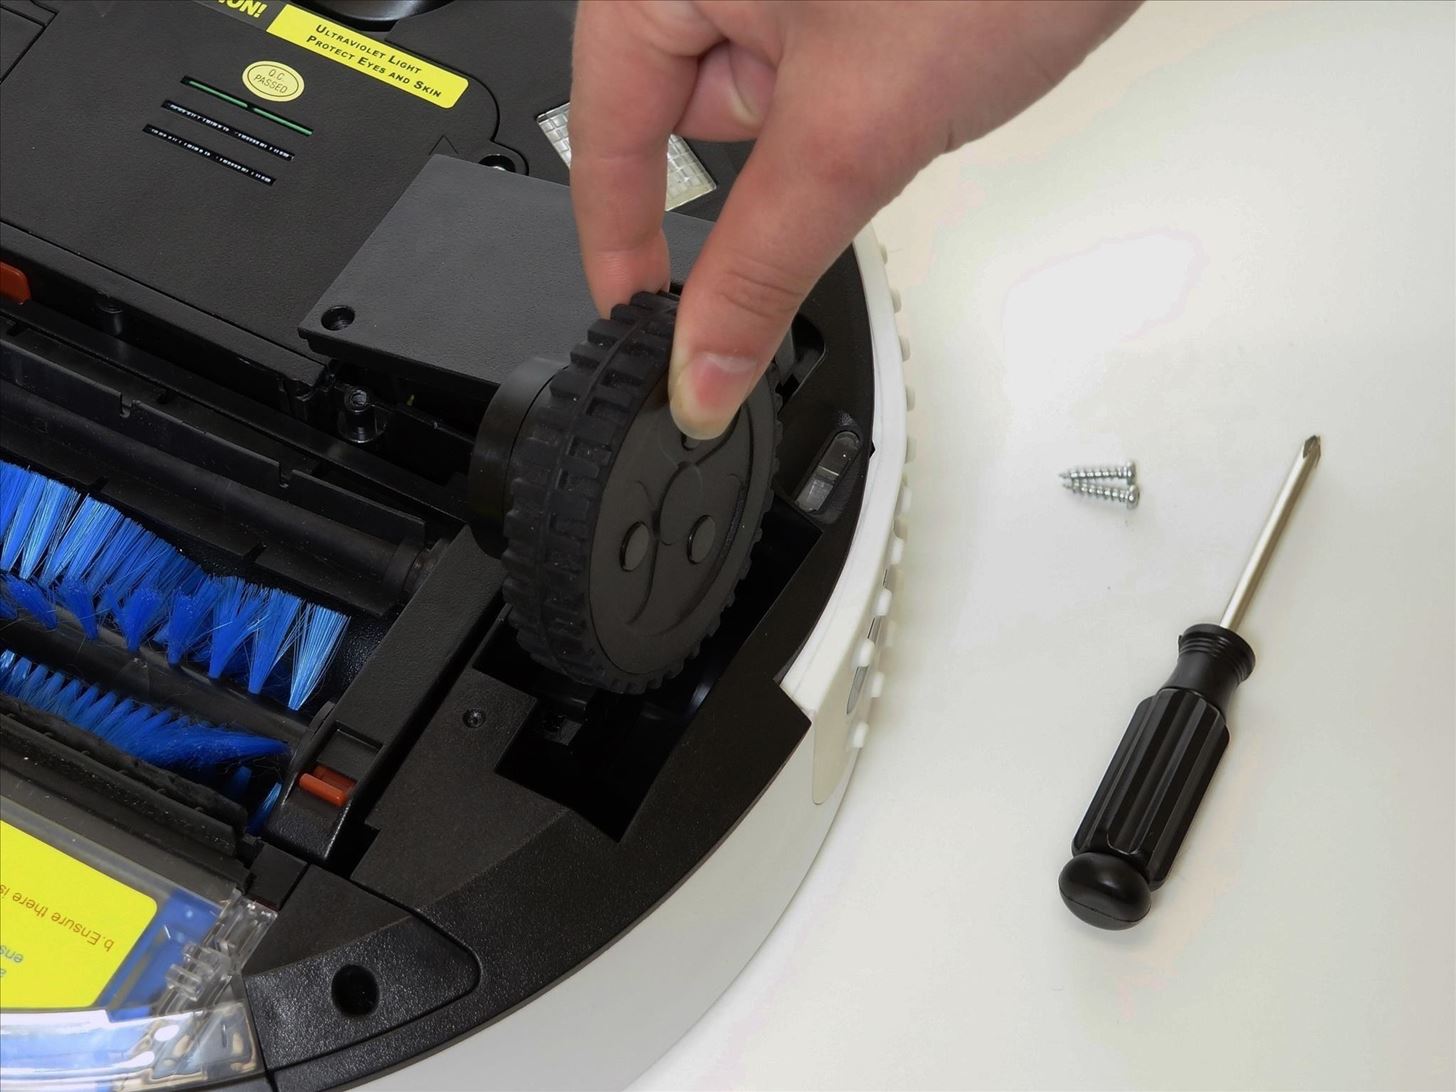
Step 1: Unscrew the Appropriate Wheel
The left and right wheels are held on bObi with two screws.
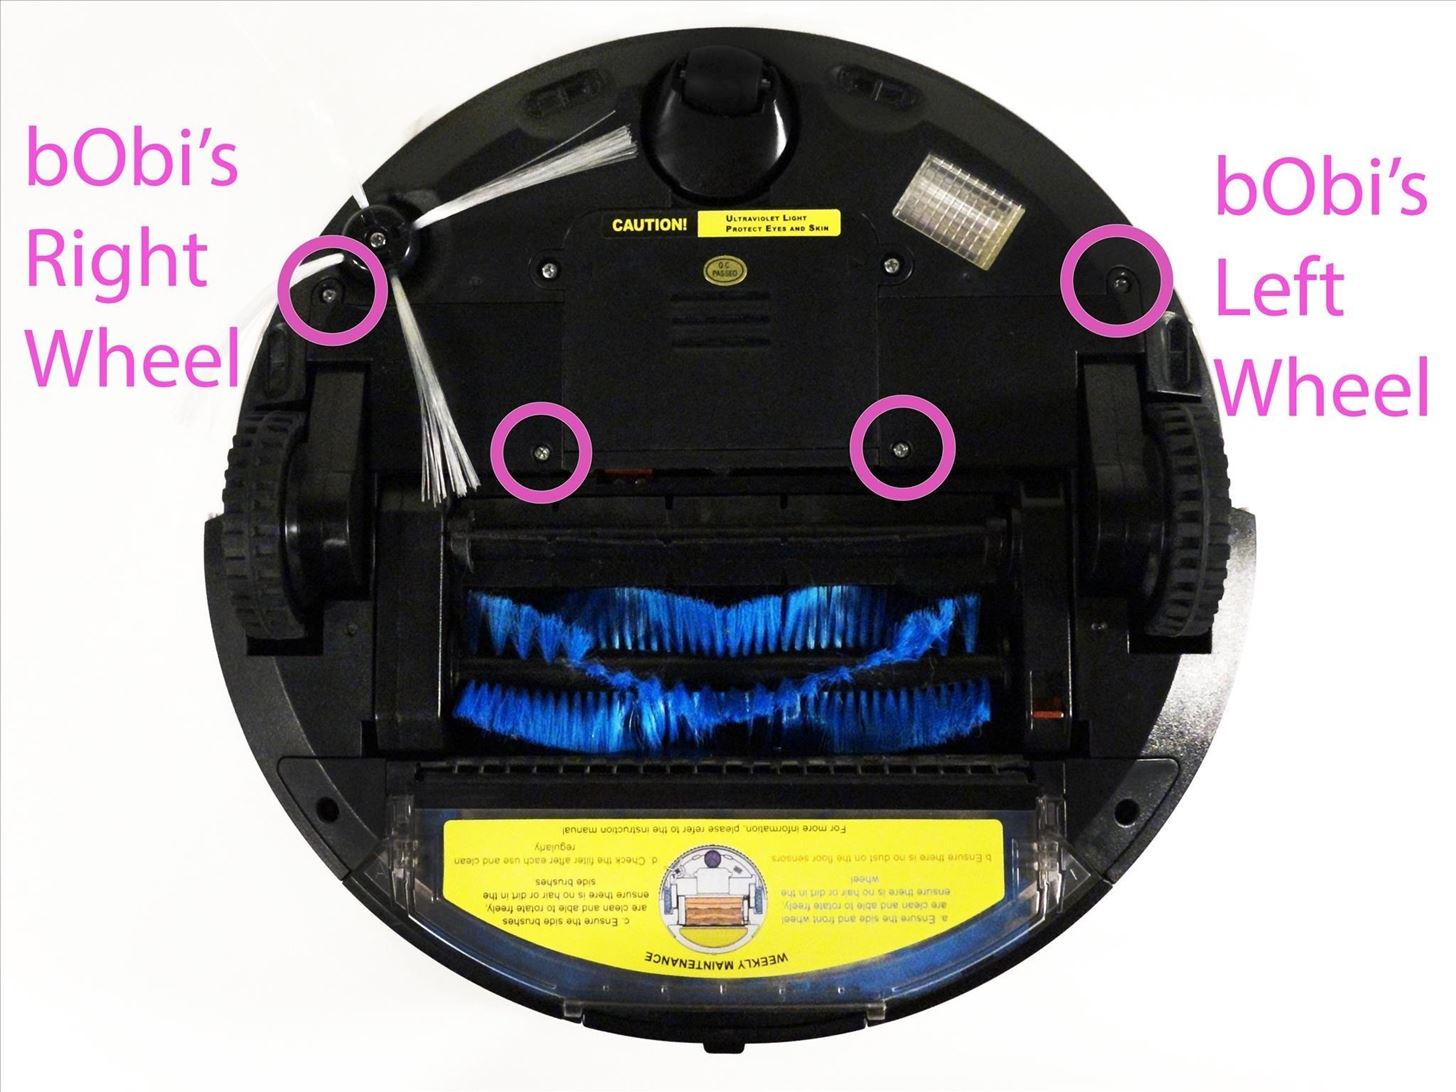
Uninstall them from the wheel you're replacing and keep both screws aside for re-assembly.
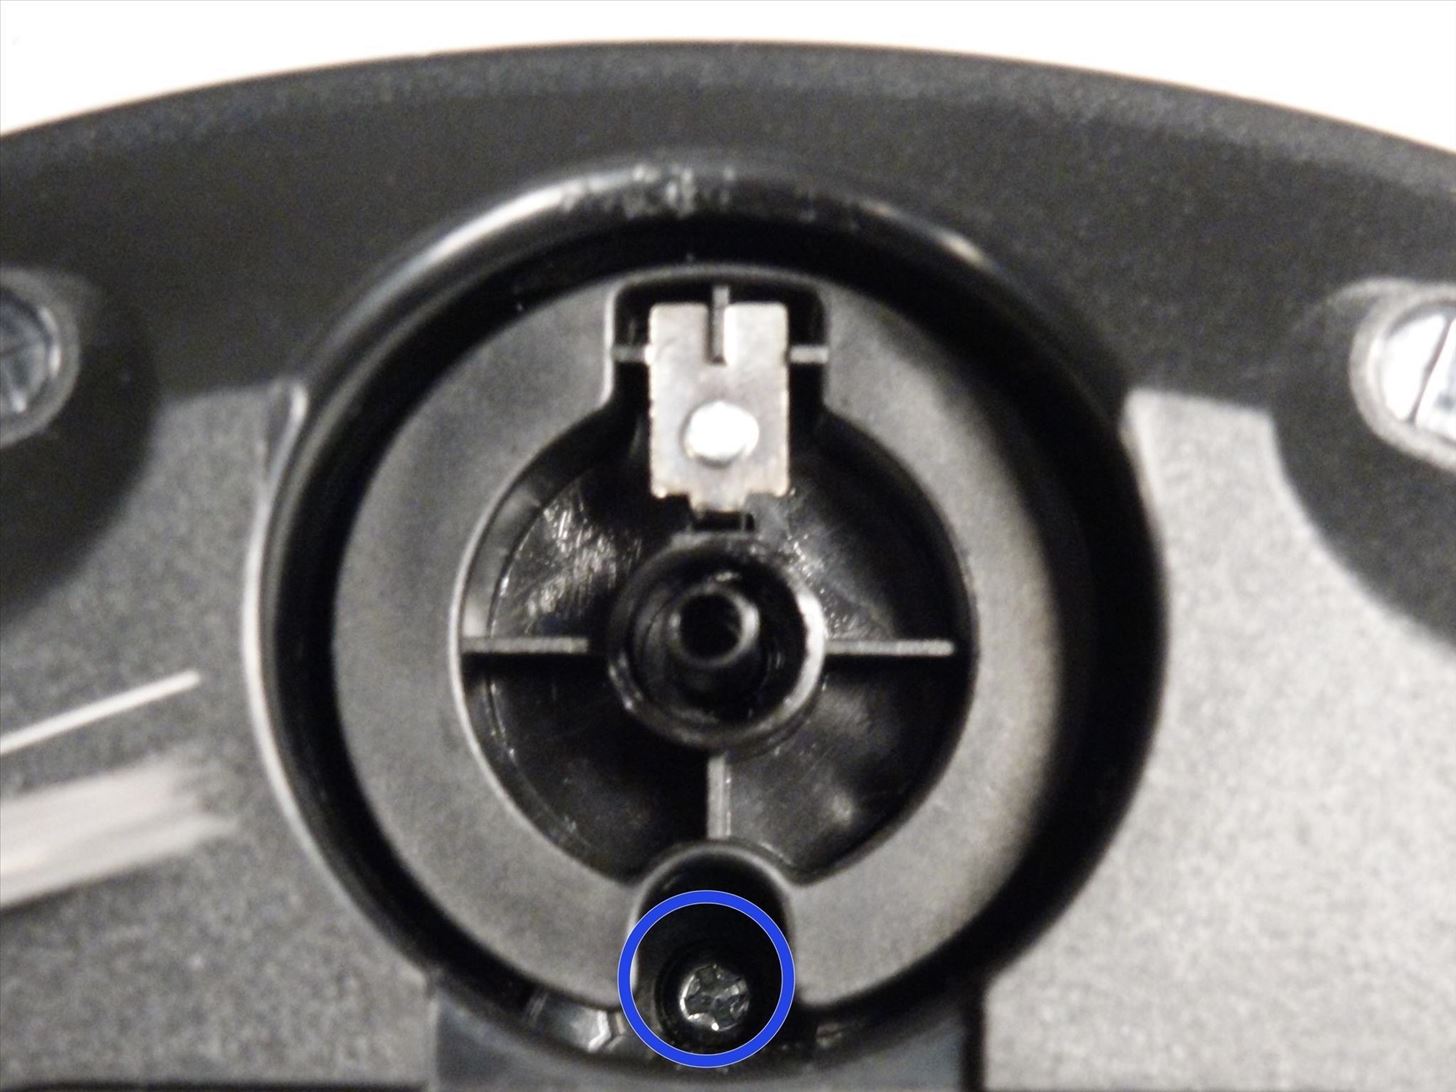
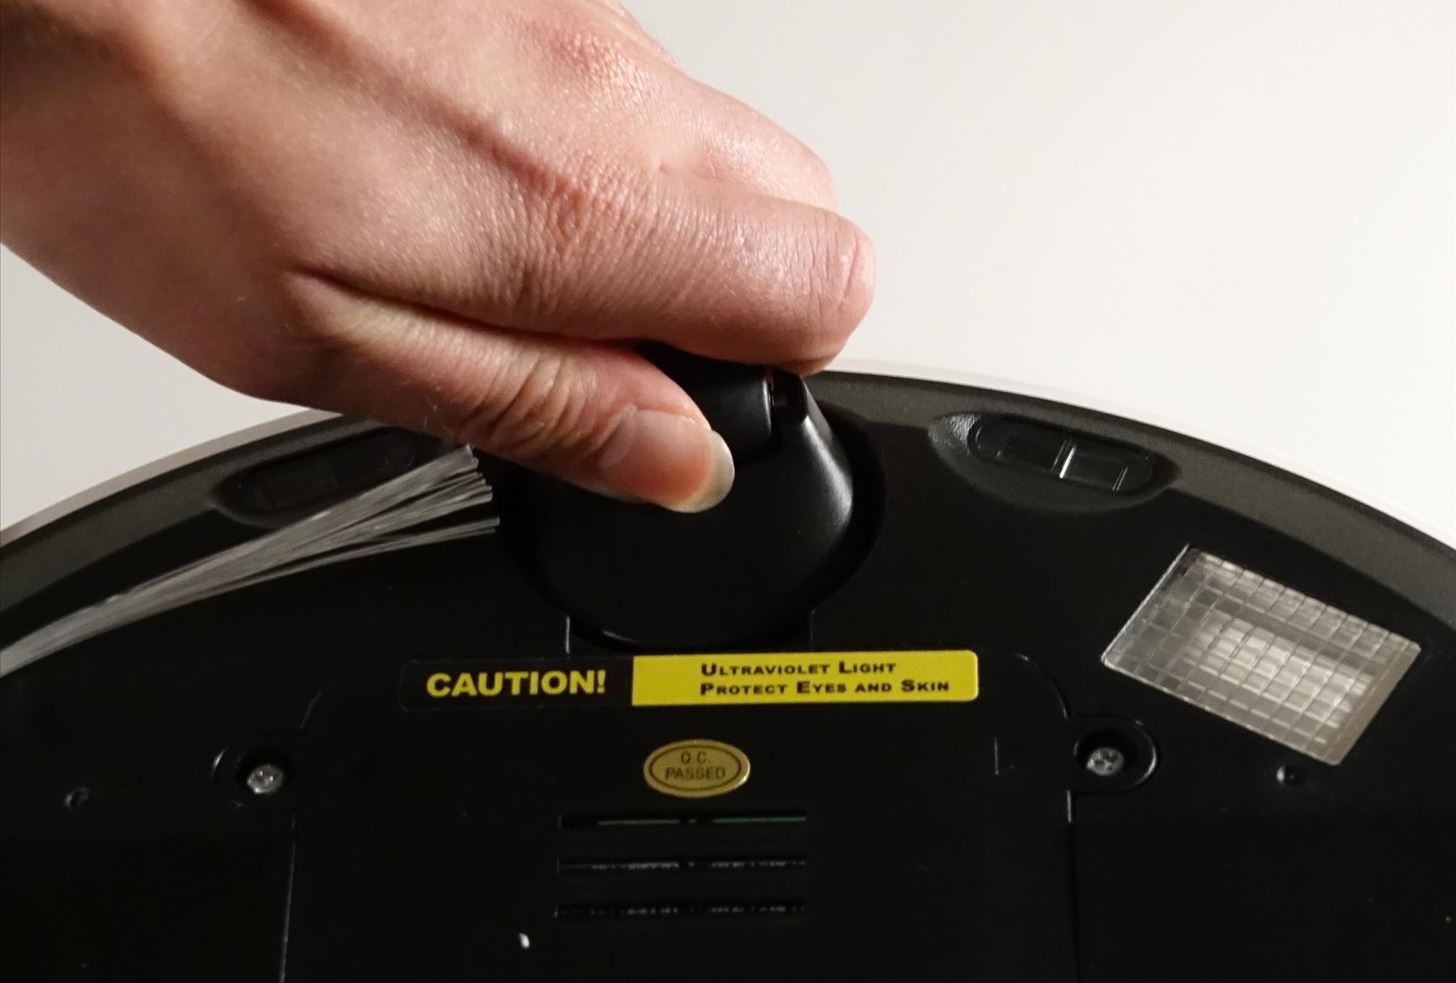
Step 2: Remove the Front Wheel
Remove bObi's front wheel to access one of the screws holding bObi together.
Make sure the wheel is turned closer to bObi's front touch sensors. Use your screwdriver for leverage, and the wheel will pop up and out.
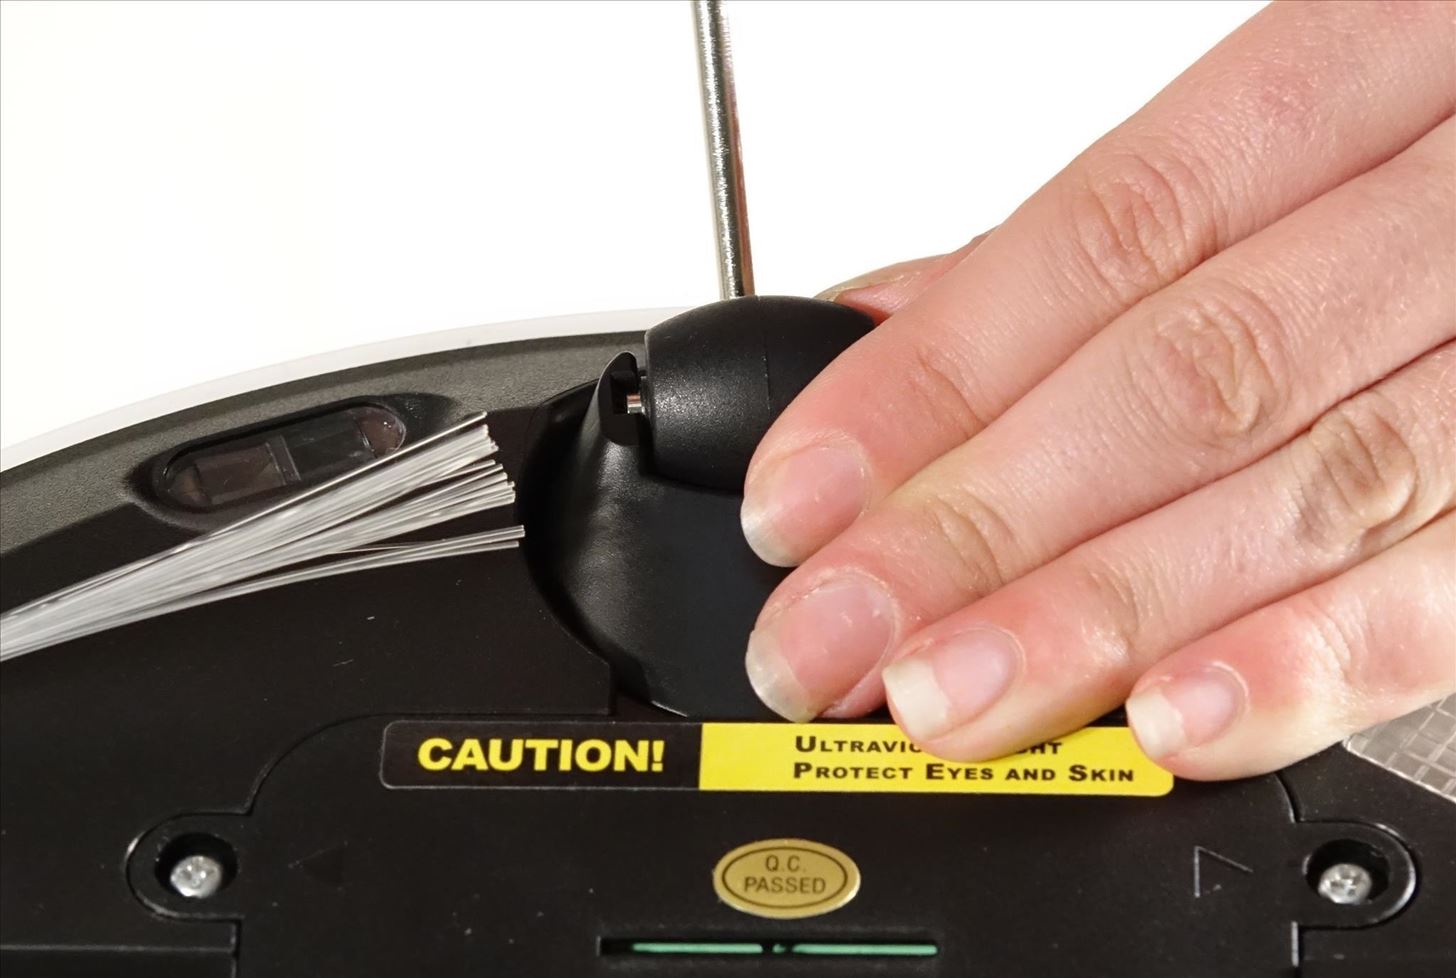
Un-install the larger screw that sits deeper in the wheel compartment.

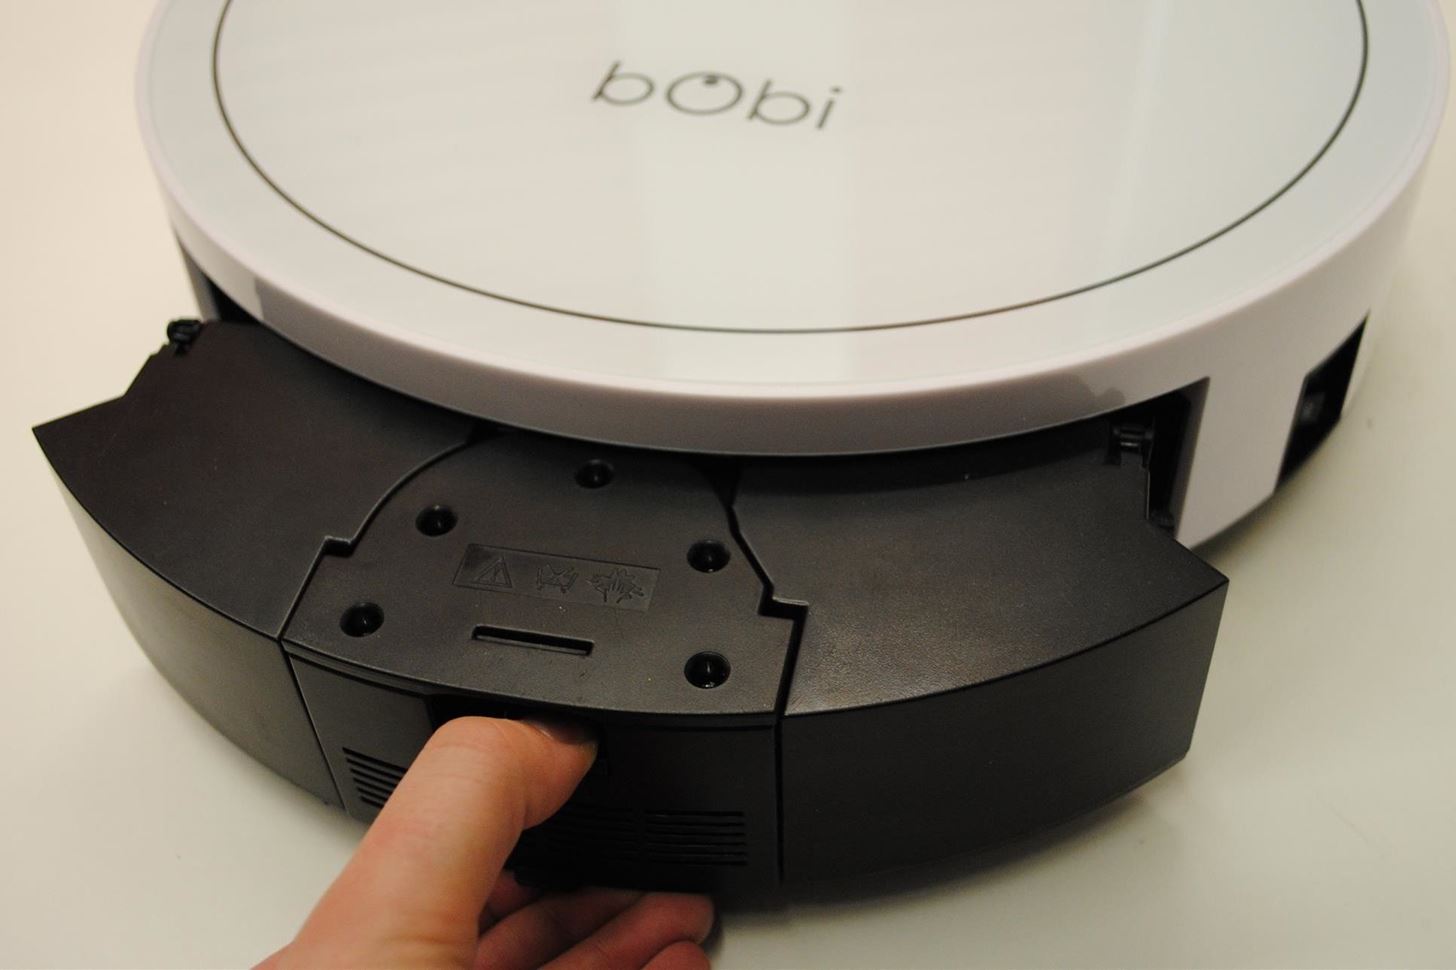
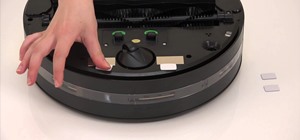
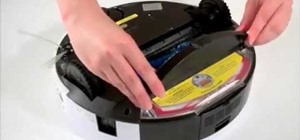
Remove bObi's dustbin.
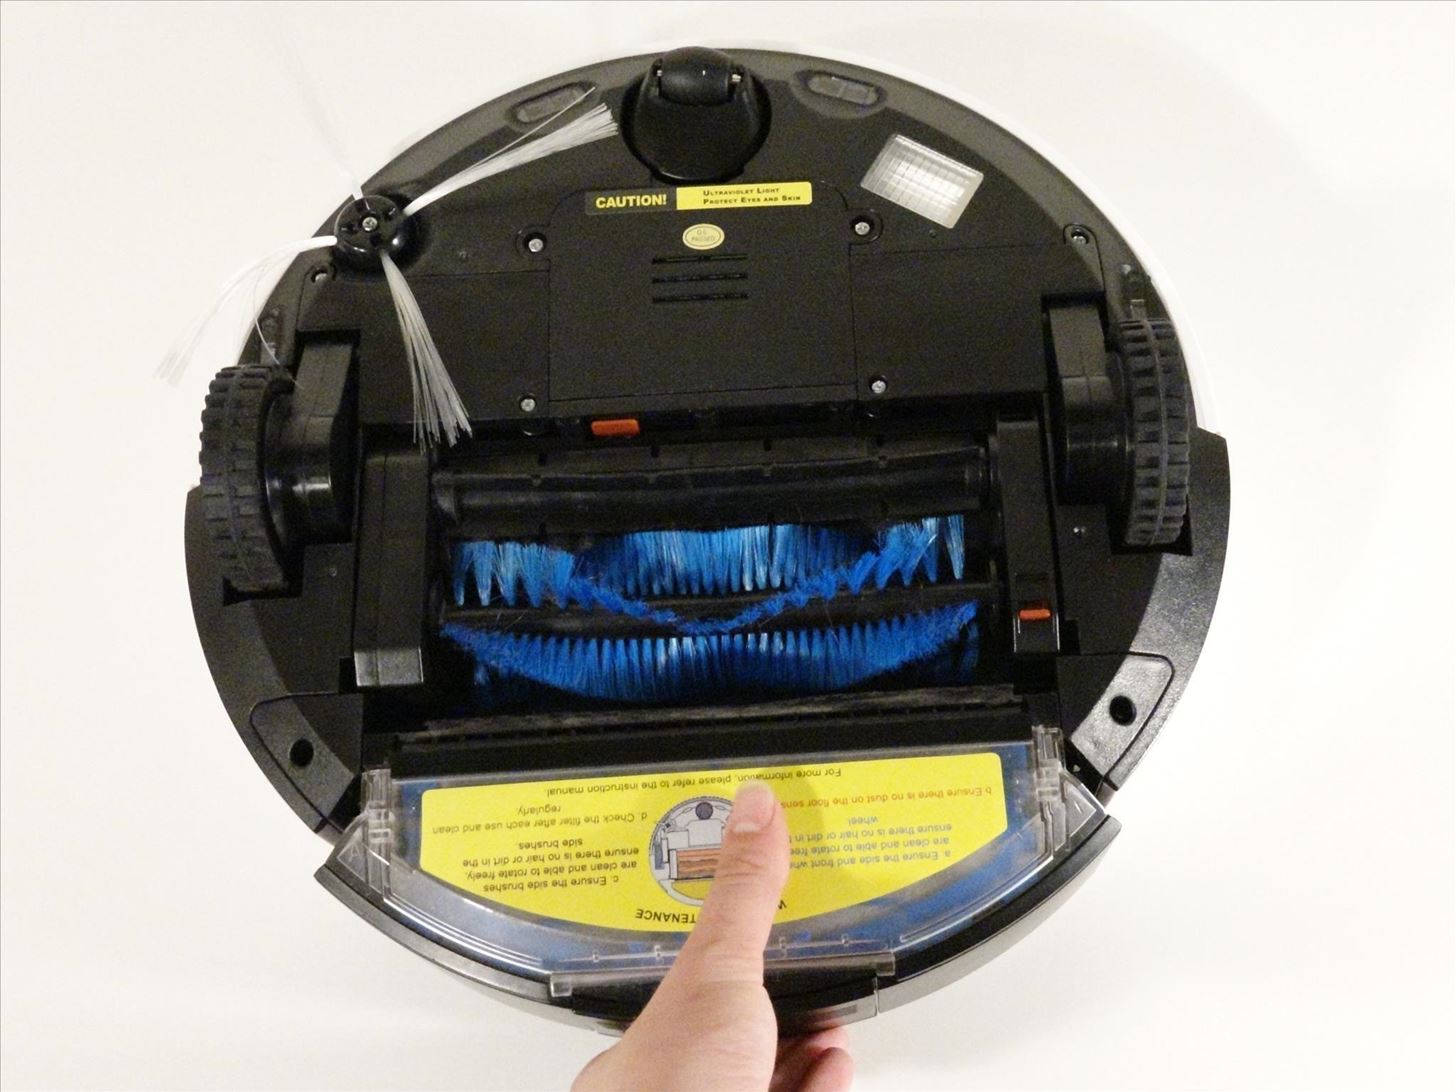
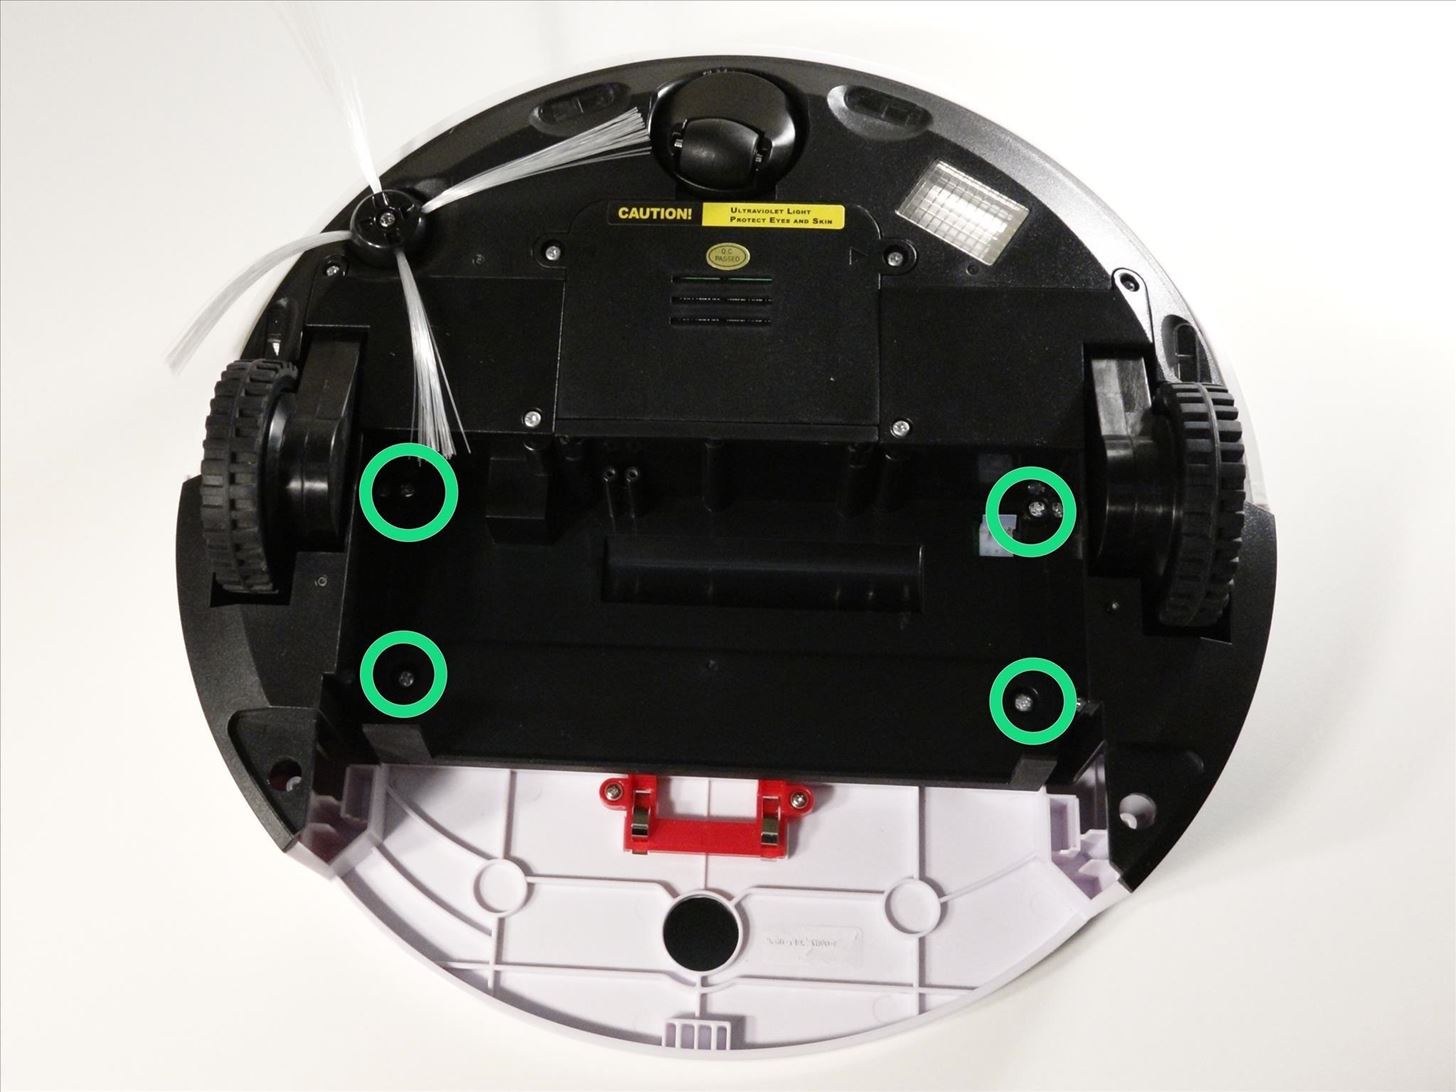
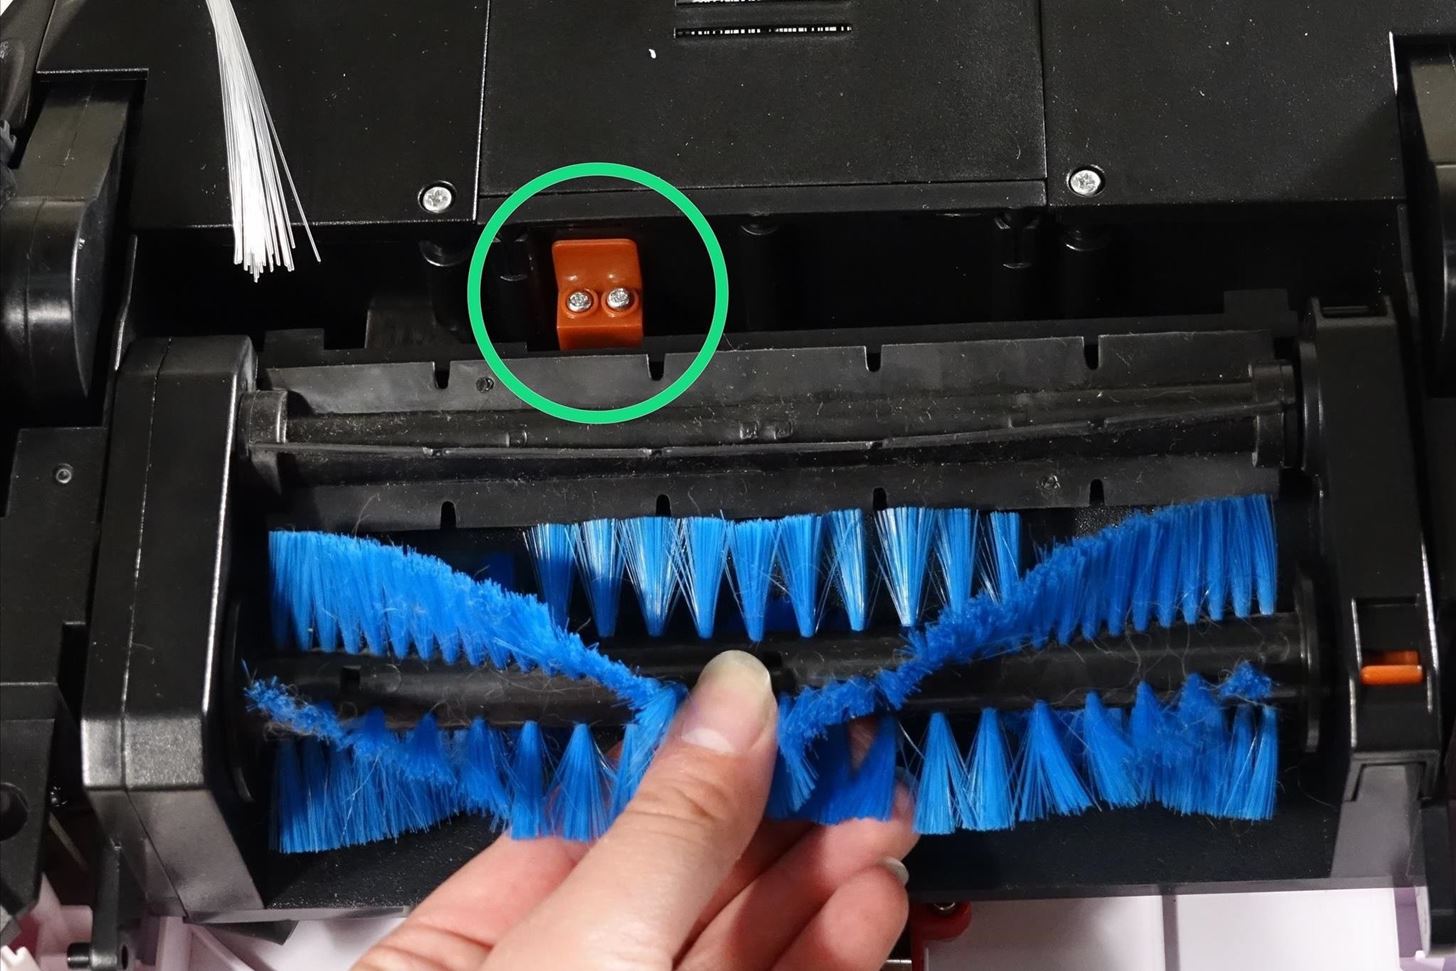
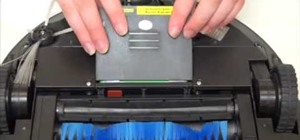
Step 3: Remove the Main Brushes
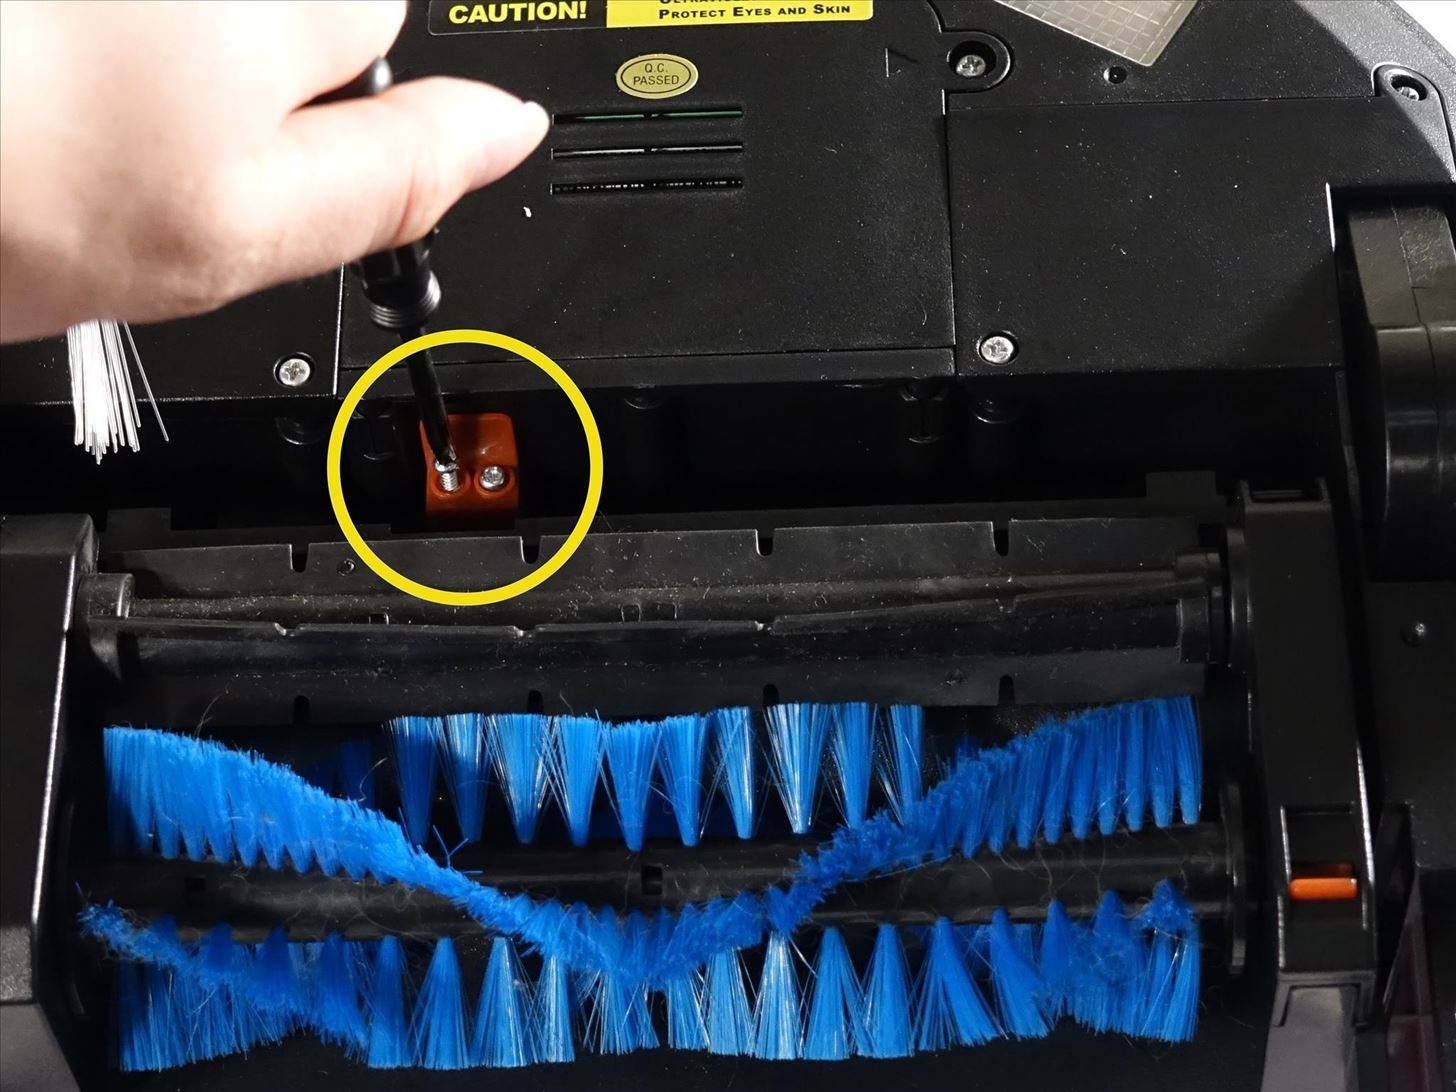
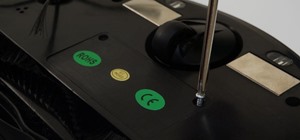
Un-install the 2 screws close to the bin. (Highlighted Green)

Then remove 2 smaller screws above her main brushes and lift the brush holder. To detach completely, unplug it from bObi. (Both Highlighted Yellow)
You'll see 4 screws beneath the main brushes. (Highlighted Blue)
Plus 2 screws on the dustbin contact point holder. (Highlighted Green)
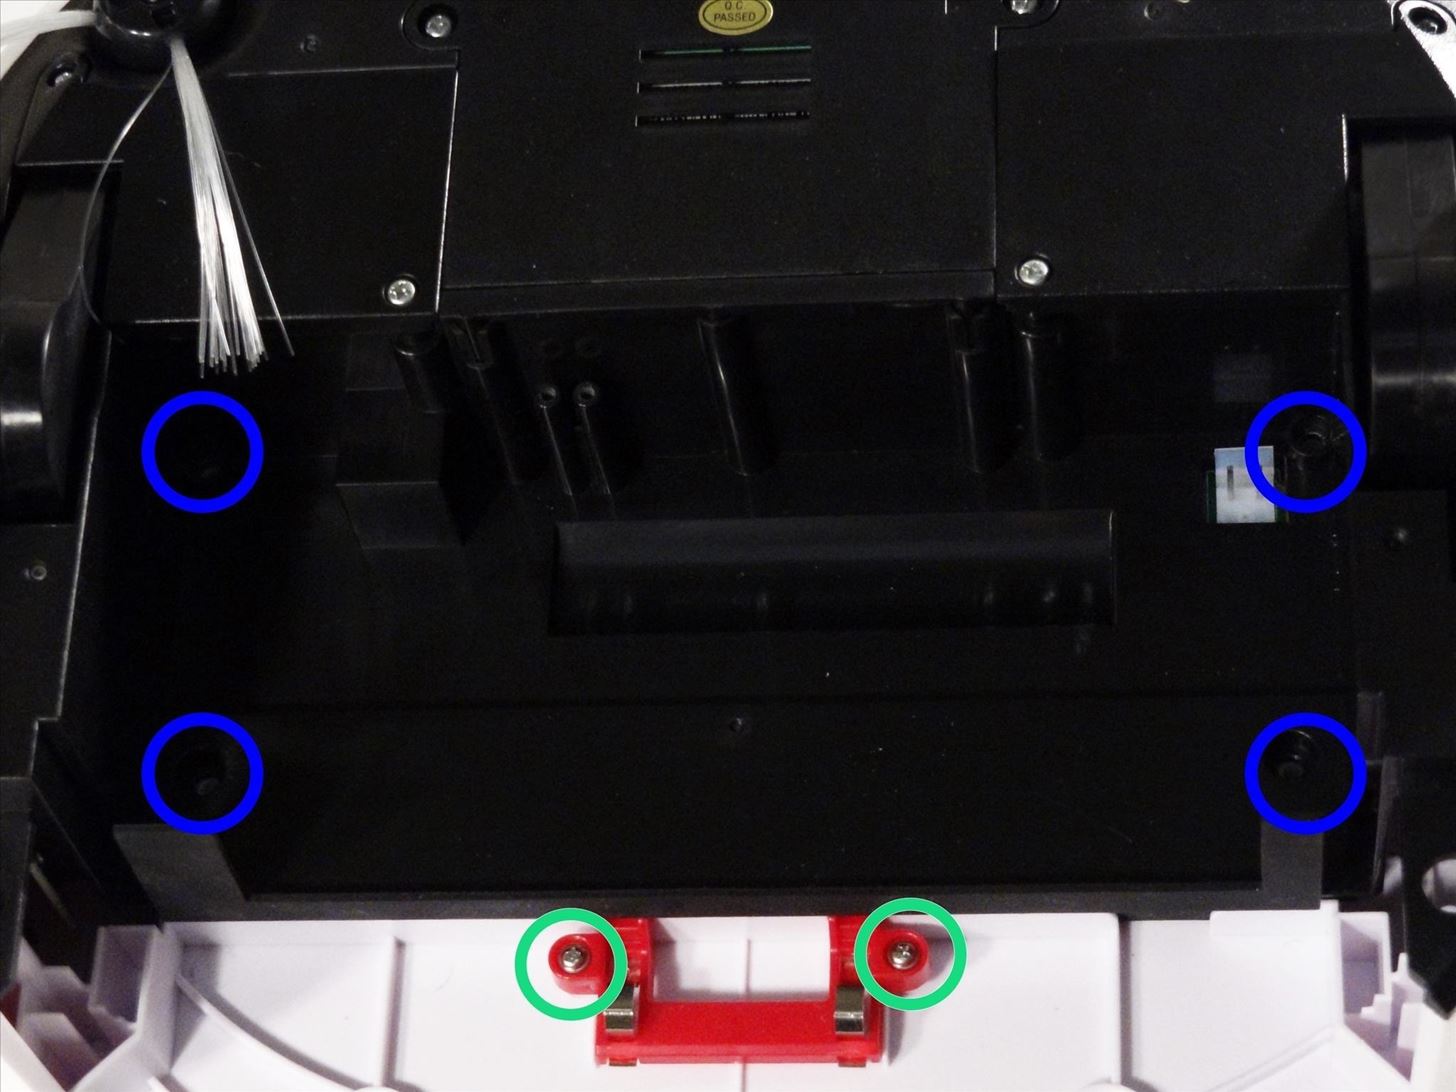
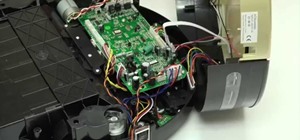
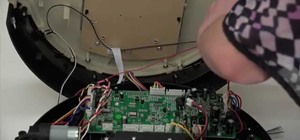
Un-install all, and open bObi up to expose her main circuit board.
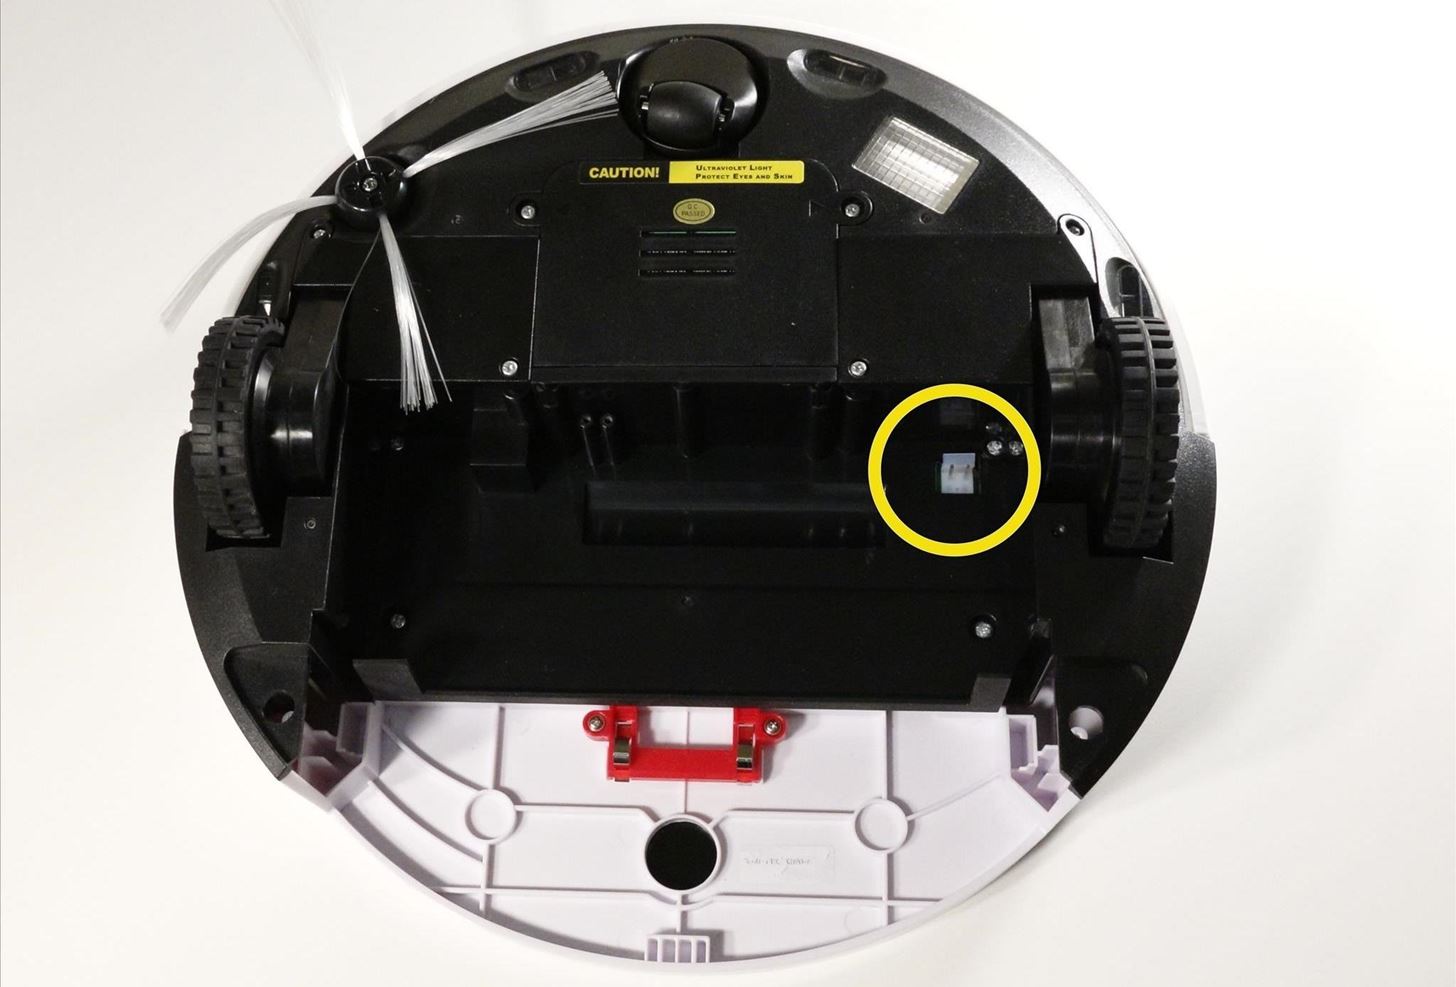
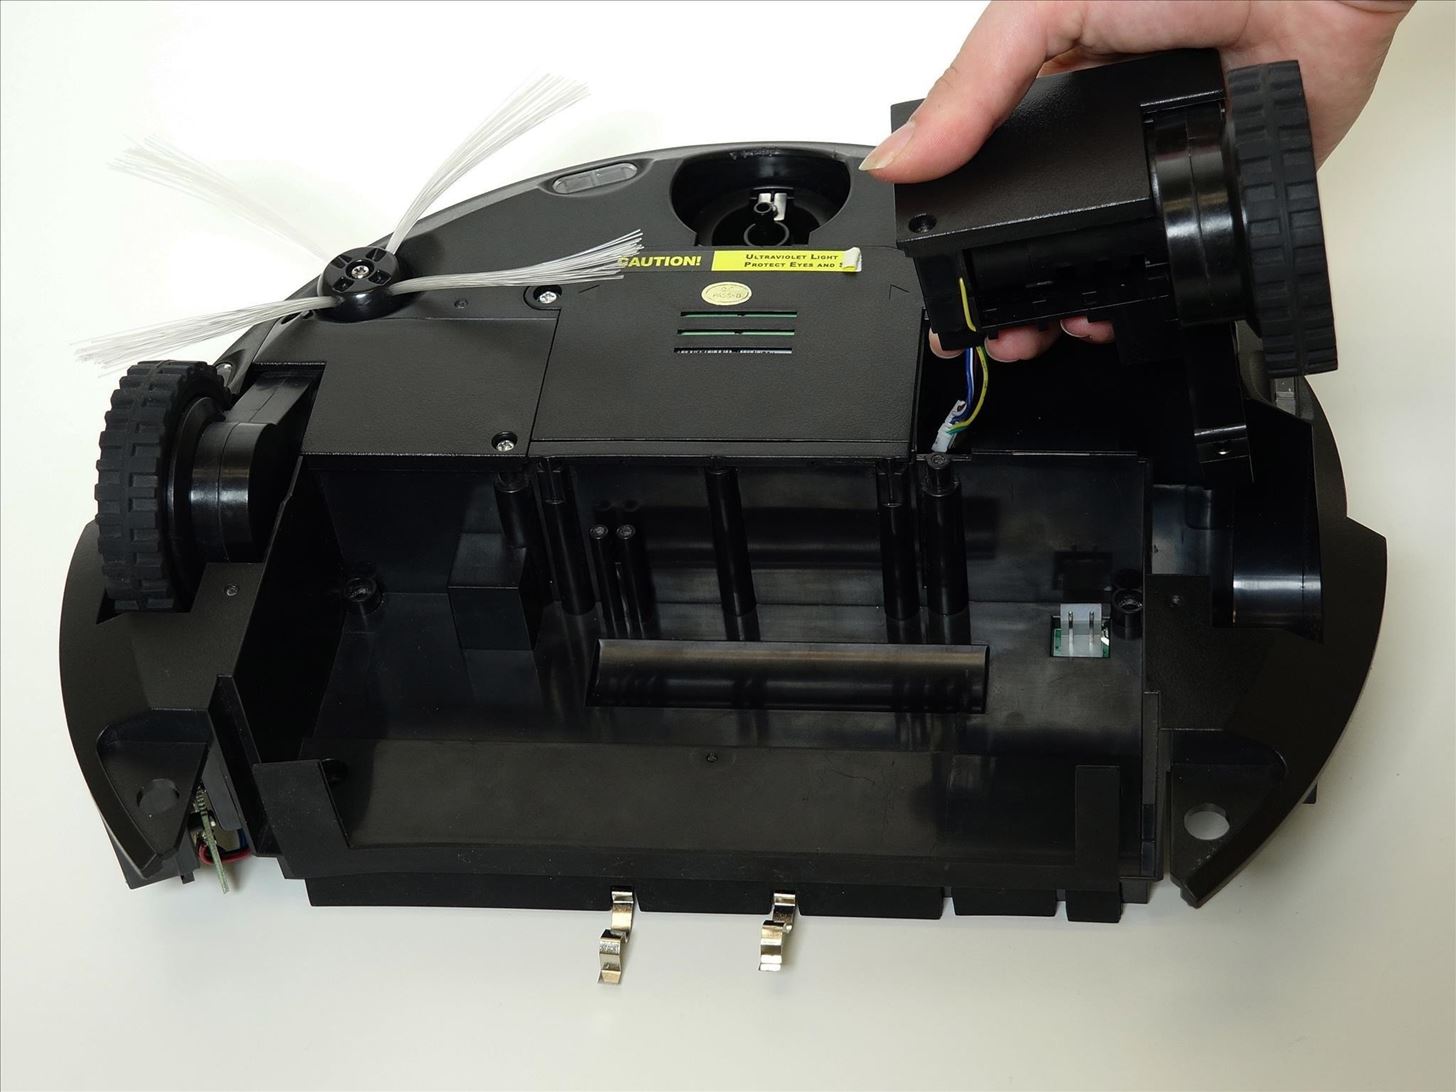
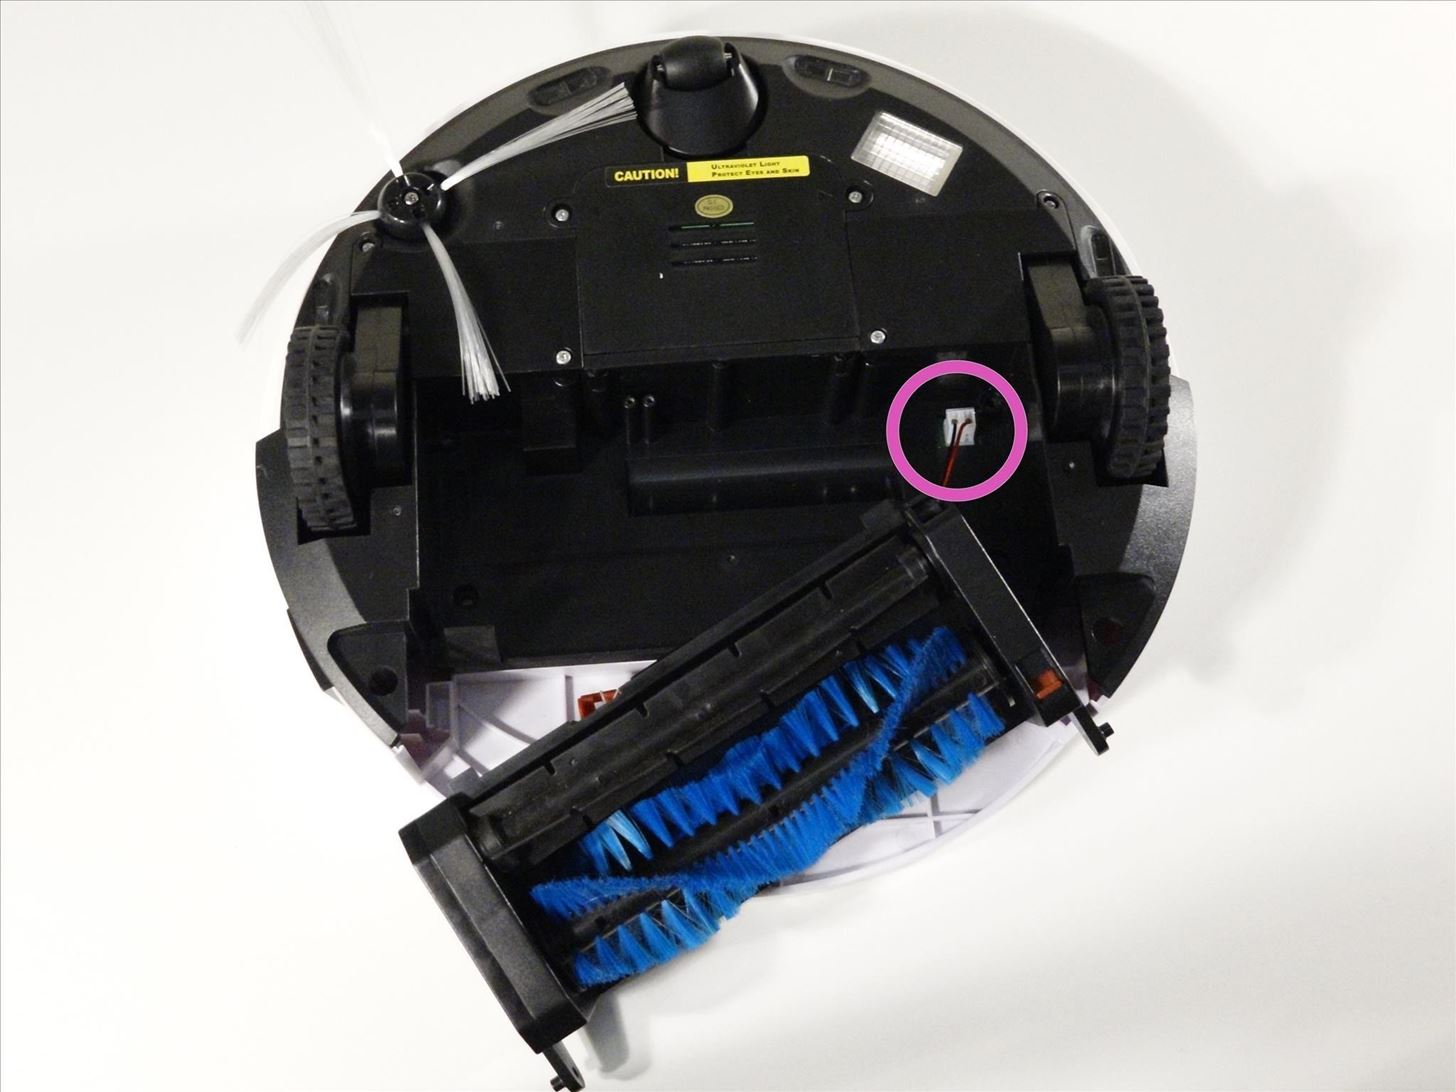
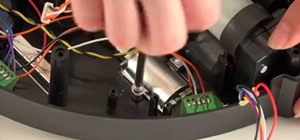
Step 4: Unplug the Cover and Wheel
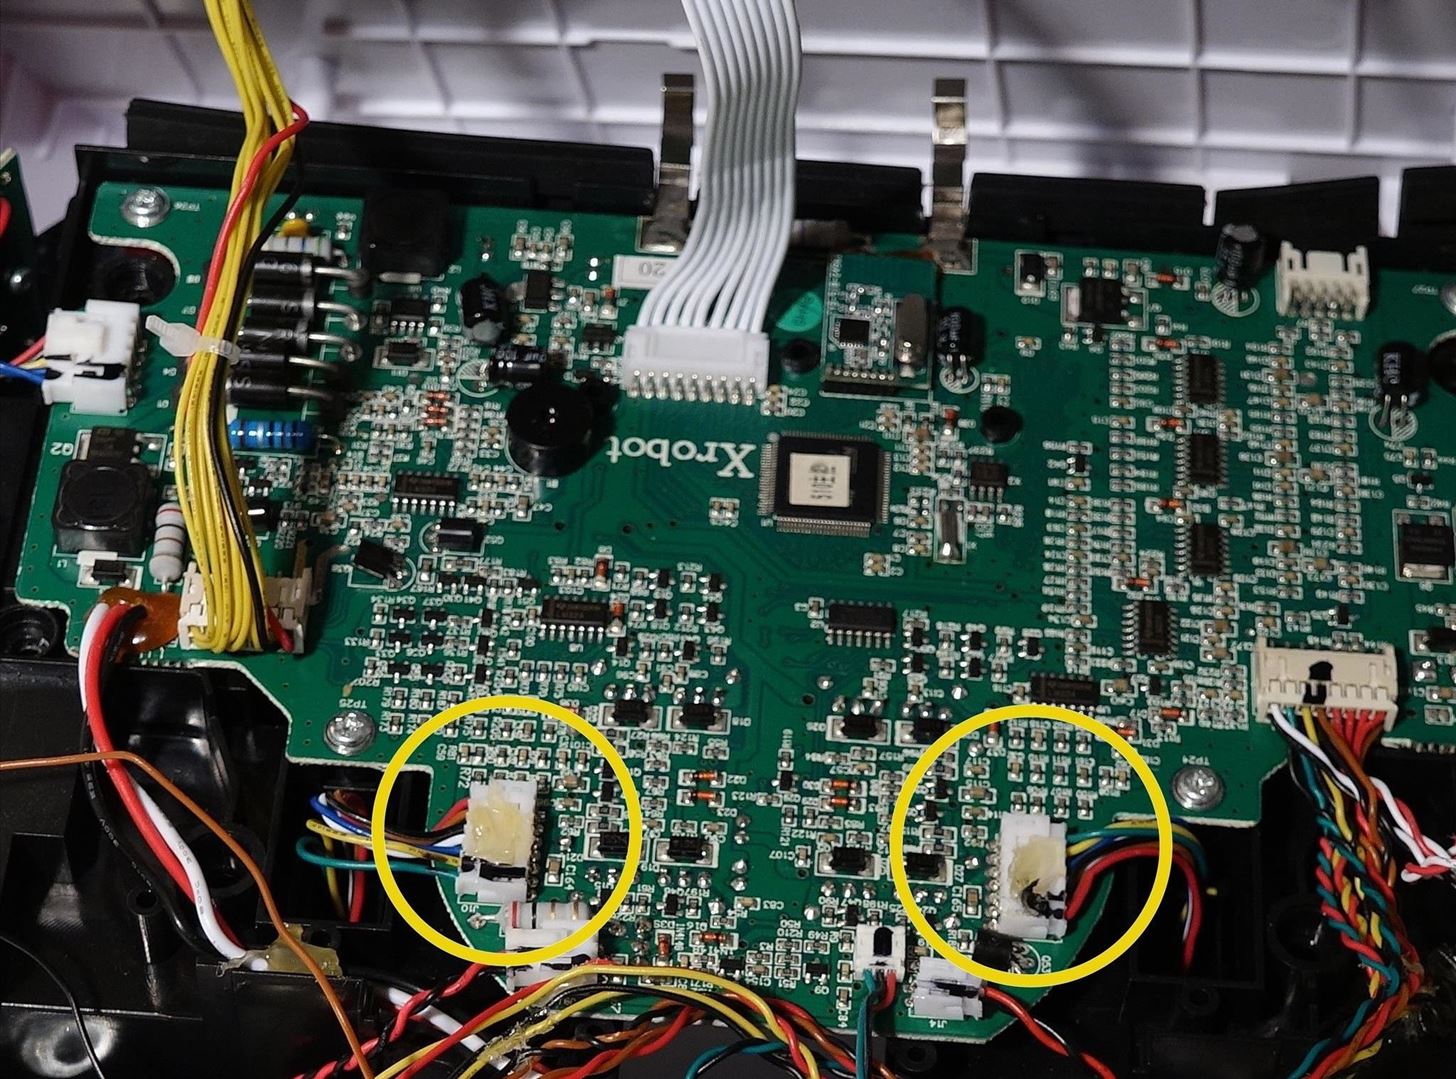
The left and right wheels attach near the front of the main board. (Highlighted Yellow)
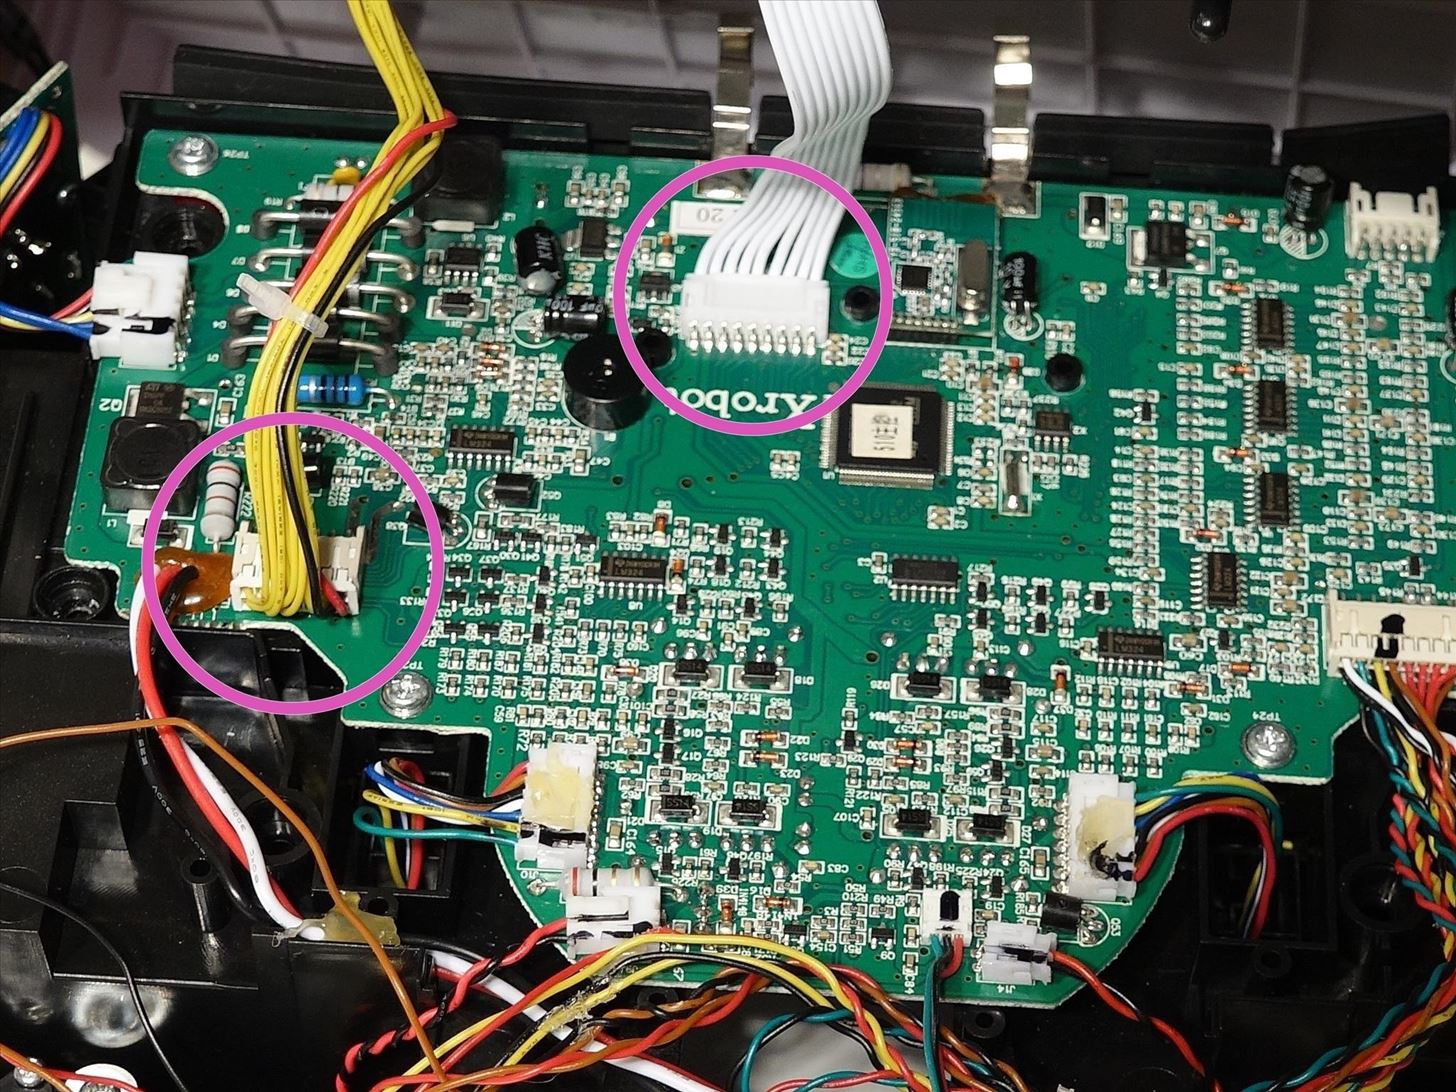
Remove two circuit plugs from the motherboard to detach the whole cover. Slide the all white plug and the yellow wired plugs out.(Highlighted Pink)
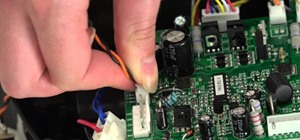
Remove the circuit plug for the wheel you wish to replace. If there is glue on the plug, simply peel it off.
Step 5: Remove the Old Wheel
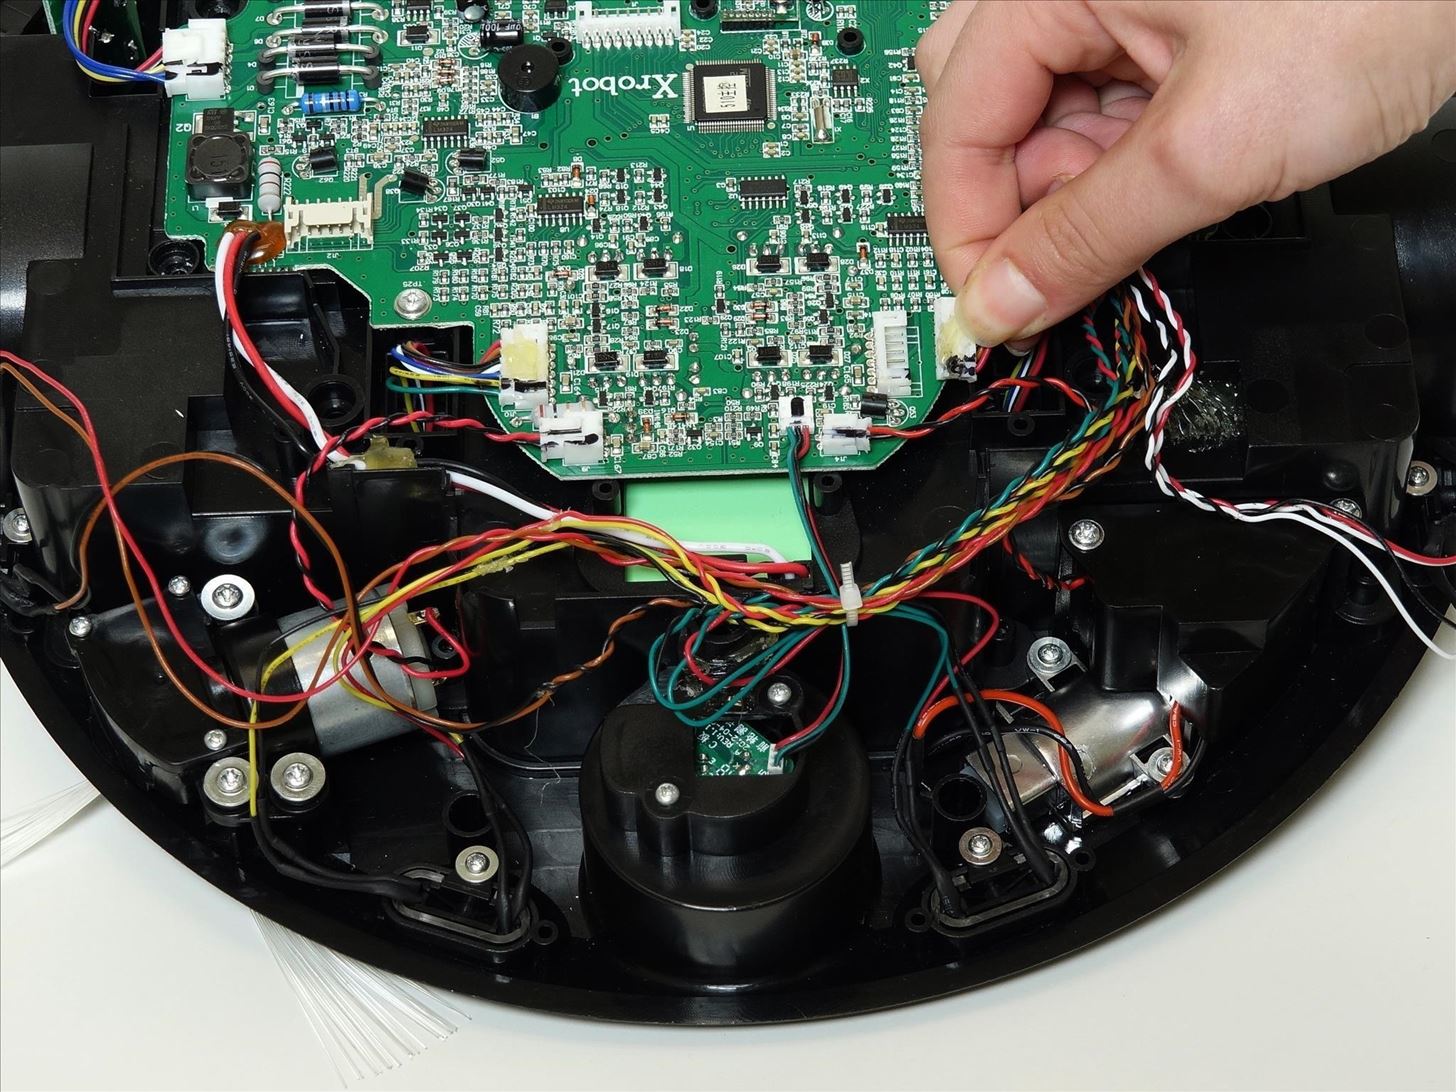
Lift bObi up slightly, and feed the wheel's wiring out of the open space so the whole wheel detaches.
Flip bObi over, and place the new wheel in the open space.
Make sure its circuit plug goes through and reaches bObi's interior.
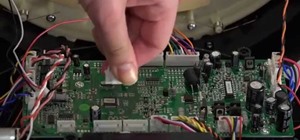
Step 6: Plug the Wheel In
Plug the wheel in its space on the main board. You may add glue or electrical tape to secure dangling wires inside bObi.
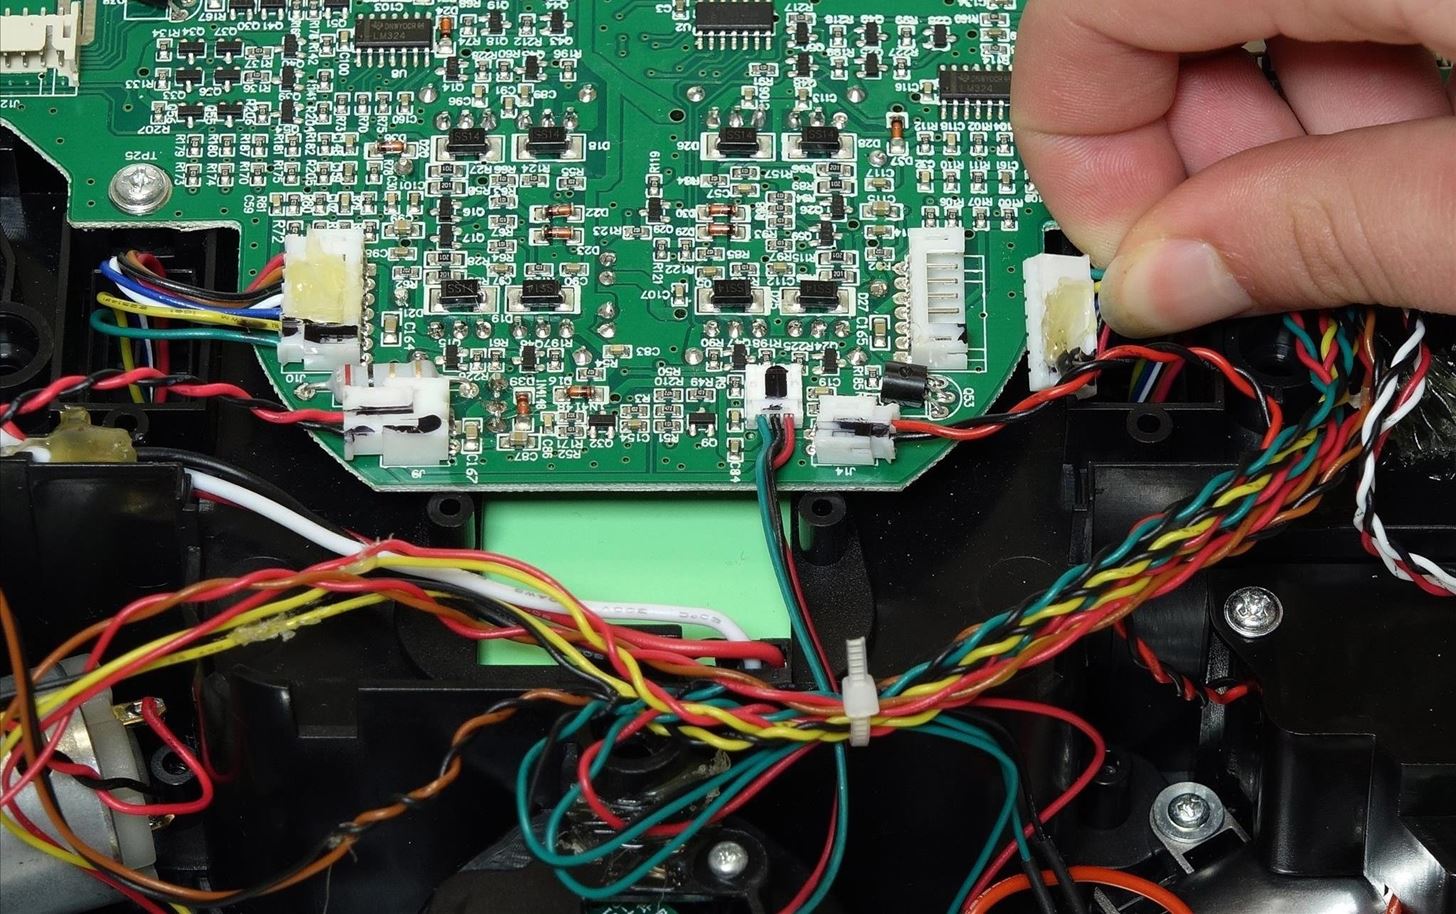
Ensure the wheel lies flat before installing its screws. (Or do this later when closing bObi up)
Step 7: Start Closing bObi
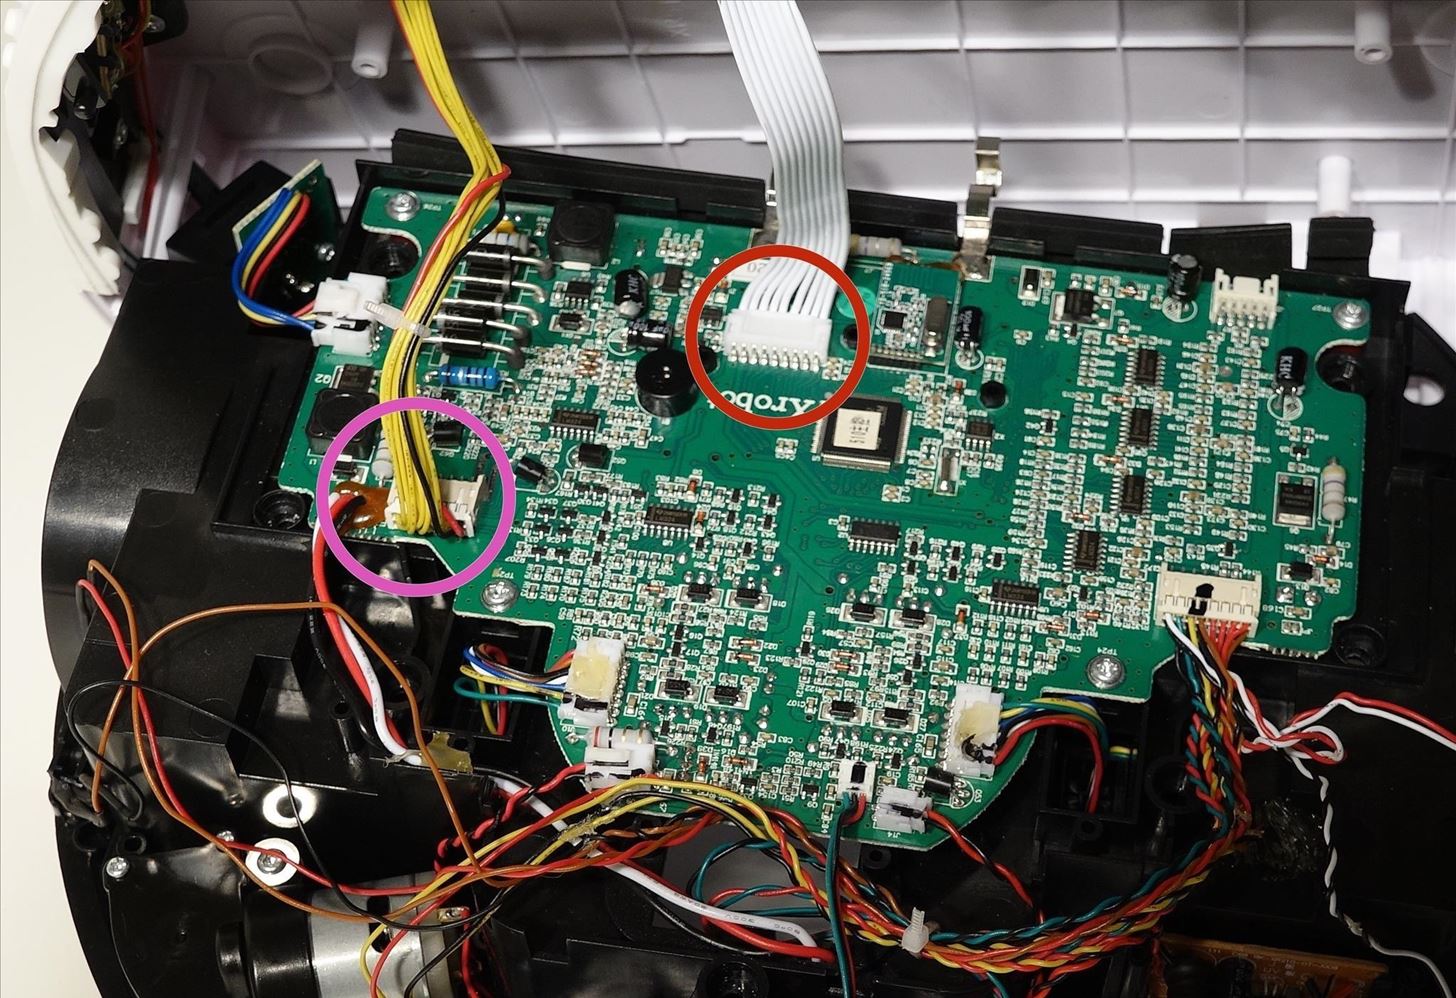
Attach the circuit plugs from bObi's cover back on her main board.
The all white plug goes in the middle. (Highlighted Red)
The smaller plug connects beside bObi's right wheel. (highlighted Pink)
Lay down bObi's cover and line up the sides carefully.
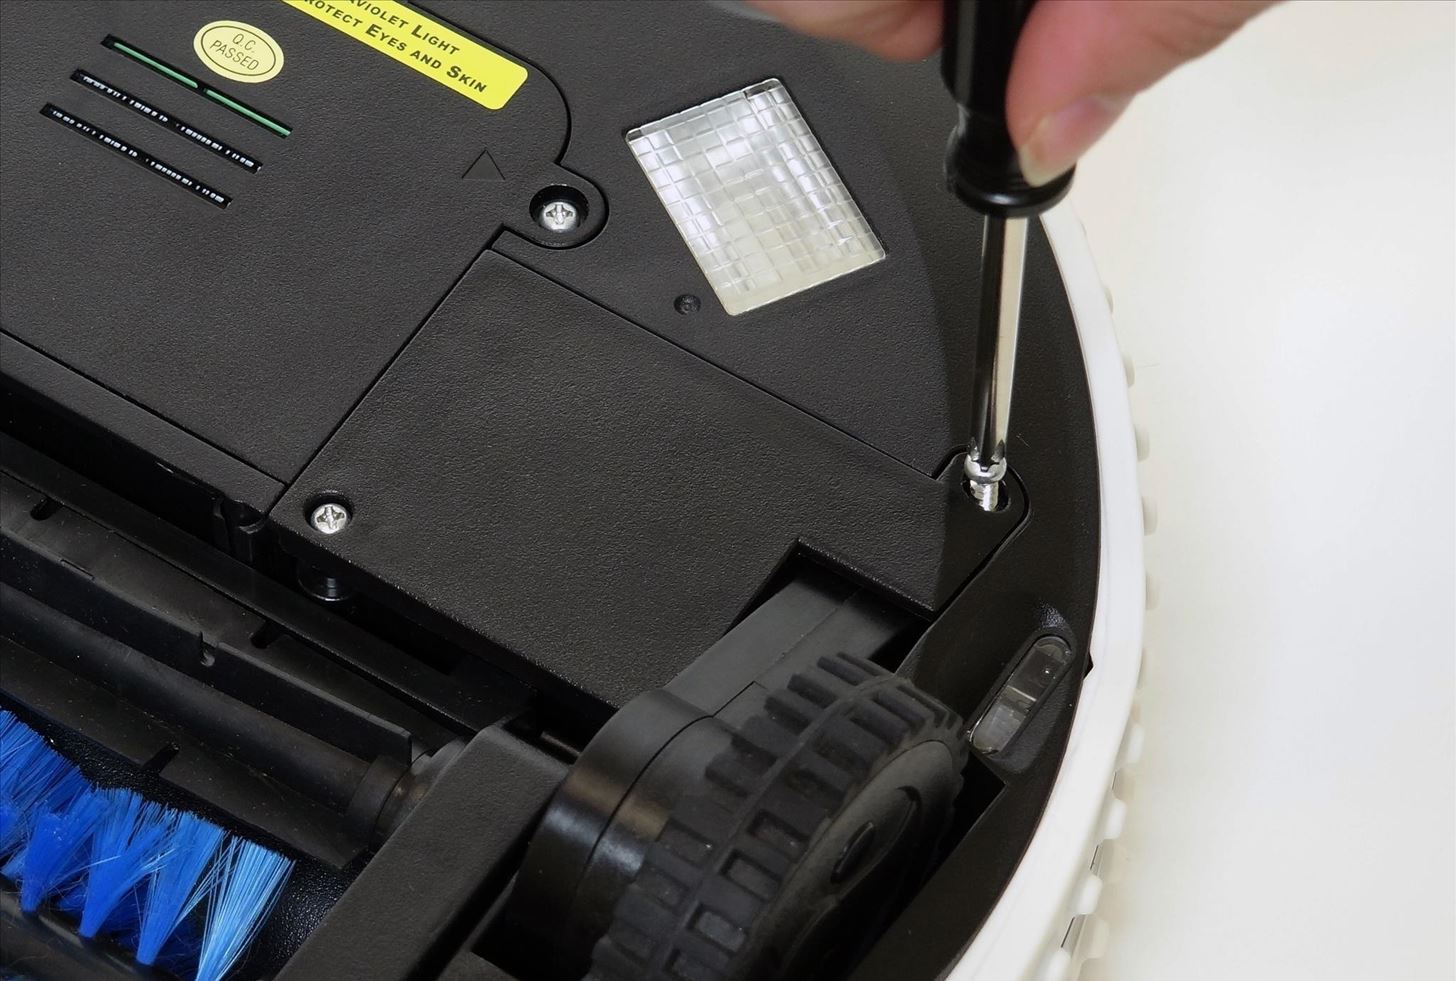
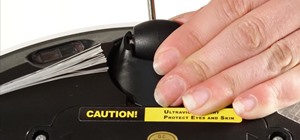
Step 8: Place the Front Wheel
Re-install the front wheel's screw. (Highlighted Blue)
Place the wheel back in its compartment so it points towards bObi's touch sensors. Push down to secure it on bObi.
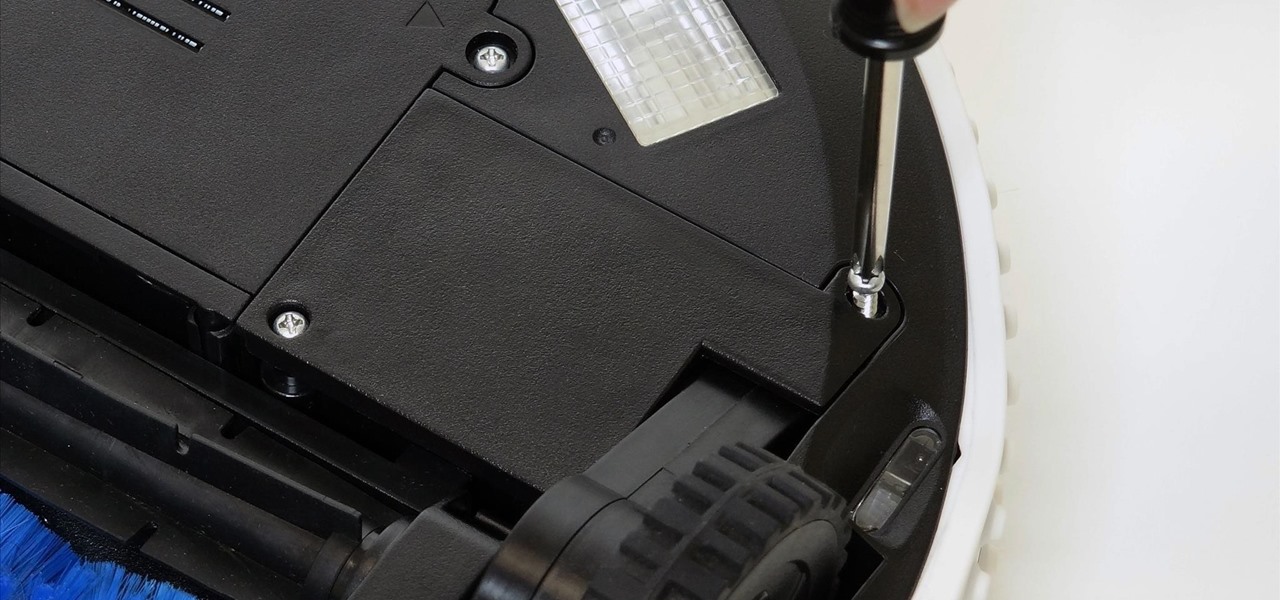
Replace the dustbin contact point fastener on bObi and install its two screws. (Highlighted Yellow)
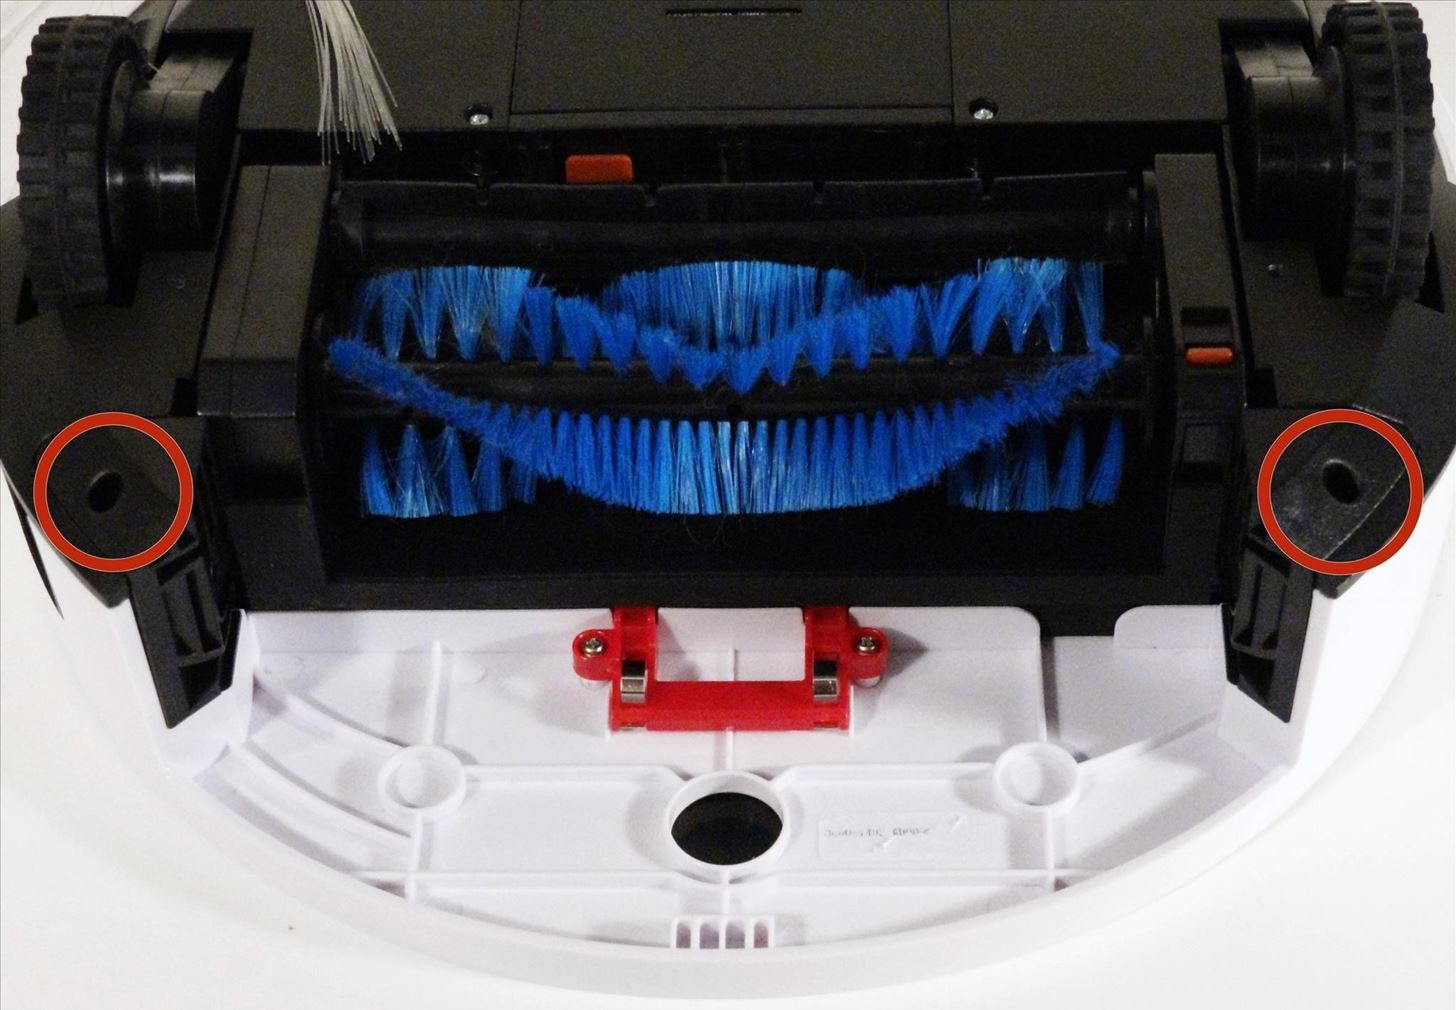
Step 9: Secure bObi's Cover
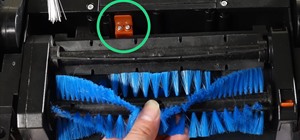
Install the four screws that were previously found under the main brushes. (Highlighted Green)
Lay the main brush attachment in the open space and plug it in. (Highlighted Pink)
Place the small main brush fastener over bObi's screw posts, then install the two thin screws which hold it in place. (Highlighted Green)
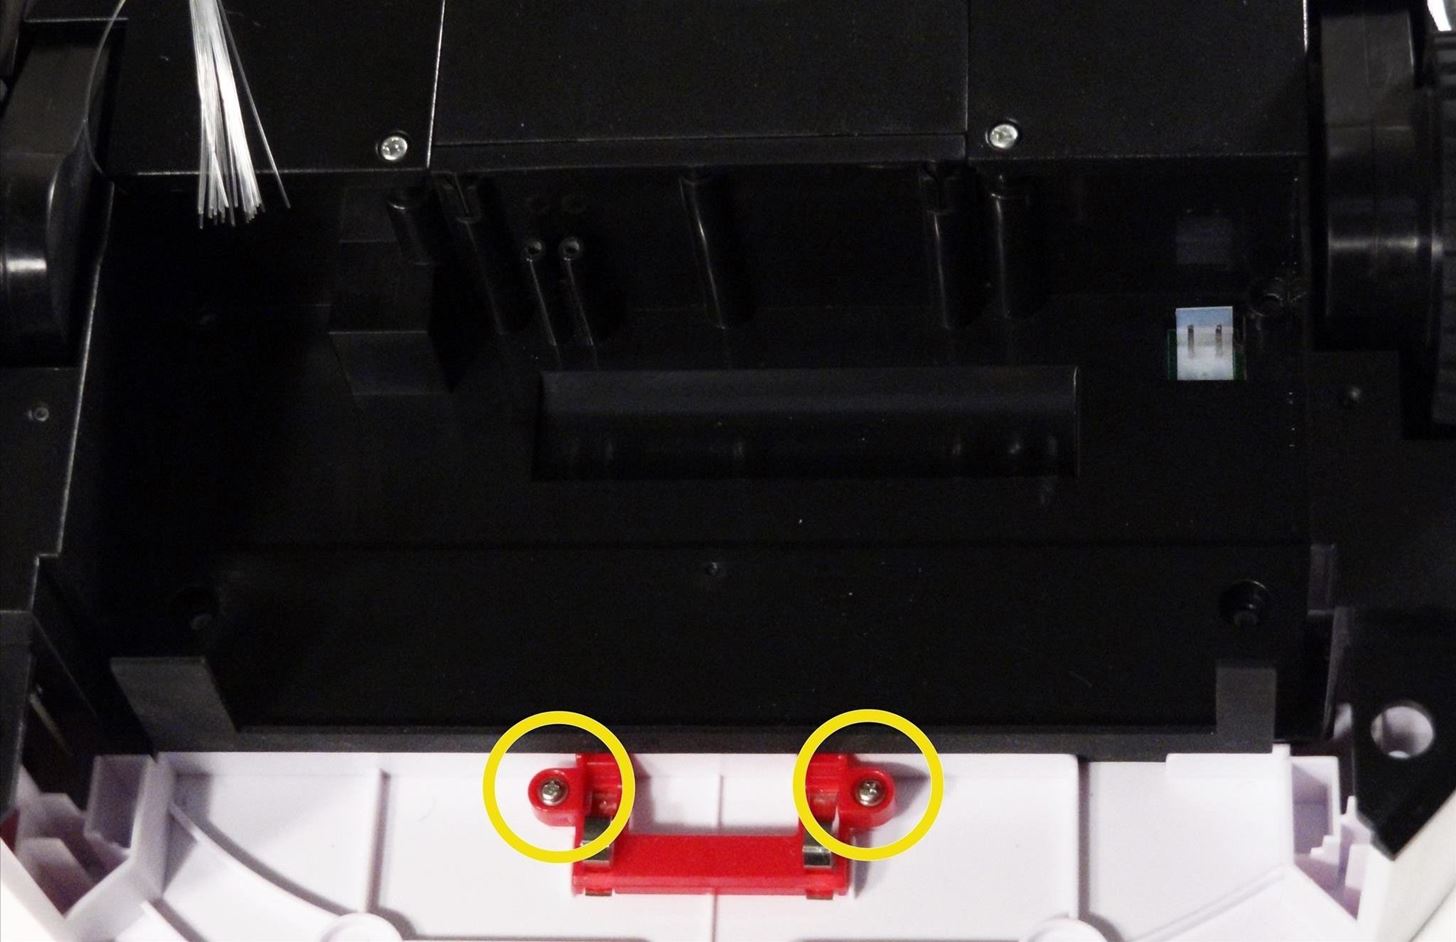
Step 10: Replace the Bin
Replace the corner pieces close to the dustbin and install the 2 screws securing them on bObi. (Highlighted Pink)
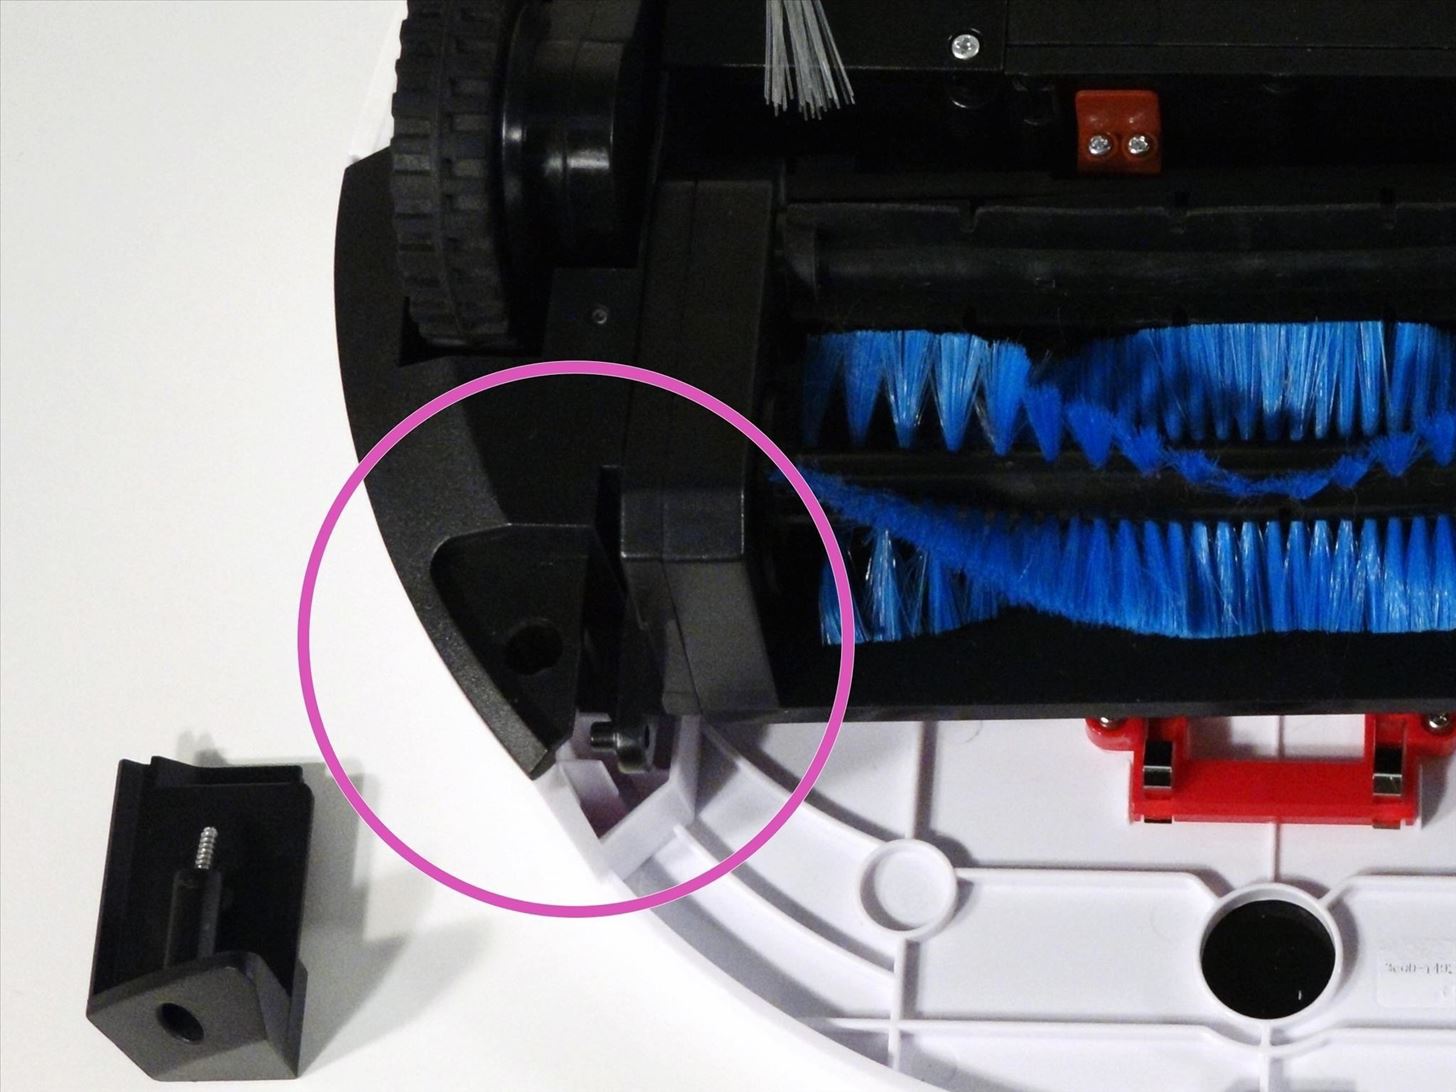
These corner pieces must line up correctly with the brush attachment and hold it in place. (Highlighted Red)
Insert the dustbin before using bObi again.
Just updated your iPhone? You'll find new emoji, enhanced security, podcast transcripts, Apple Cash virtual numbers, and other useful features. There are even new additions hidden within Safari. Find out what's new and changed on your iPhone with the iOS 17.4 update.


Be the First to Comment
Share Your Thoughts